Table of Contents
- Why Sealing Kitchen Worktop Joints Matters
- Tools Needed for Sealing Worktop Joints
- Best Sealant for Laminate Worktop Joints
- Preparing Your Worktop Before Sealing
- Step-by-Step Process for Sealing Joints
- How to Fix Swollen Kitchen Worktop
- Common Mistakes to Avoid When Sealing Worktop Joints
- Maintaining Sealed Worktop Joints Long-Term
- Frequently Asked Questions
Last Updated: September 3, 2026
Why Sealing Kitchen Worktop Joints Matters
Unsealed worktop joints are a silent disaster waiting to happen. Water seeps into gaps between laminate or solid-surface panels, swells the substrate, and within months you're looking at warping, discolouration, and structural failure. By then, the damage is often irreversible.
Sealing kitchen worktop joints properly stops this before it starts. A proper seal creates a waterproof barrier that prevents moisture penetration, extends the life of your worktops by years, and keeps them looking intact rather than damaged. The difference between a sealed joint and an unsealed one isn't cosmetic, it's the difference between a worktop lasting five years and lasting fifteen (peer-reviewed research).
The real challenge isn't understanding why sealing matters. It's knowing how to do it correctly so the seal actually holds. Most people either skip this step entirely, use the wrong sealant, or apply it in a way that fails within months. Surface Magic Repairs has seen countless worktops damaged by poor sealing attempts, and has experience in repairing many of them.
This guide covers the tools you'll need, the best sealants for different worktop materials, and the exact process for sealing joints that will actually last. We'll also walk you through common mistakes so you can avoid them.
Tools Needed for Sealing Worktop Joints
Before you touch any sealant, gather the right equipment. Using proper tools makes the difference between a professional-looking seal and a messy one that fails.
Essential tools:
- Caulking gun, A standard manual caulking gun is sufficient. Look for one with a smooth trigger action and a release mechanism that stops the plunger mid-stroke.
- Sealant, The type depends on your worktop material (covered in the next section).
- Masking tape, Low-tack painter's tape protects adjacent surfaces and creates clean edges. Essential for a neat finish.
- Utility knife or craft knife, For trimming excess sealant and removing old, dried sealant from joints.
- Caulking tool or smoothing tool, A plastic caulking tool, wet finger, or even a plastic spoon can smooth the sealant into the joint. Some prefer a silicone smoothing tool for better control.
- Damp cloth or sponge, For wiping away excess sealant before it sets.
- Cleaning supplies, Methylated spirits or white spirit for degreasing the joint before sealing. Isopropyl alcohol works as well.
- Sandpaper, Fine-grit sandpaper (120-150 grit) for smoothing rough edges or old sealant residue.
- Safety glasses, Protect your eyes from sealant splatter, especially when using a caulking gun.
Having these tools ready before you start prevents mid-job trips to the shop and ensures you can complete the seal kitchen worktop joints process without interruption.
Best Sealant for Laminate Worktop Joints
Choosing the right sealant for your worktop material is critical. The wrong choice will fail, crack, or discolour within months.
Silicone sealant is the most common choice for laminate and most solid-surface worktops. It's waterproof, flexible, and tolerates the minor movement that occurs as worktops expand and contract with temperature changes. Silicone doesn't bond chemically to the surface, it sits in the joint and creates a physical barrier. This is actually an advantage because it won't crack if the worktop shifts slightly.
Use 100% silicone sealant, not acrylic caulk. Acrylic caulk absorbs water and fails quickly in kitchen environments. Silicone resists moisture far better and lasts significantly longer.
Colour matching matters more than most people realise. Choose a sealant colour that matches your worktop or grout lines. Clear silicone works for most situations, but if your worktop has visible grout or a specific colour scheme, a tinted silicone will blend better and look less obvious.
Acrylic latex caulk is sometimes used for worktop joints, but it's not ideal. It's cheaper and easier to apply, but it absorbs water over time and breaks down faster than silicone. In a busy kitchen, acrylic caulk typically fails within 2-3 years. Silicone lasts 5-10 years with proper application (the CDC).
Polyurethane sealants are another option if you're sealing joints that will experience significant movement or stress. They're more flexible than silicone and bond more strongly to the surface. However, they're harder to smooth and can be messier to apply.
For most homeowners and rental properties, 100% silicone sealant is the best choice. It's reliable, affordable, and widely available at any DIY shop.
Preparing Your Worktop Before Sealing
Preparation determines whether your seal will hold or fail. Rushing this step is the most common mistake.
Step 1: Clean the joint thoroughly. Remove all old sealant, dirt, grease, and debris. Use a utility knife to scrape out old, dried sealant. Be careful not to damage the worktop surface itself. For stubborn sealant, soften it first with a heat gun set to low, then scrape.
Once the joint is clear, wipe it down with methylated spirits or white spirit on a cloth. This removes grease and residue that would prevent the new sealant from bonding properly. Let it dry completely, at least 30 minutes.
Step 2: Inspect the joint for damage. Look for cracks, gaps wider than 5mm, or signs of water damage. If the joint is damaged beyond a simple surface gap, you may need to fill it first with a flexible filler before sealing. Sealant alone won't bridge large gaps or repair structural damage.
Step 3: Apply masking tape. Run low-tack painter's tape along both sides of the joint, about 3-5mm away from the gap. This protects your worktop surface and creates a clean edge for the sealant. Press the tape down firmly so sealant doesn't seep underneath.
Step 4: Ensure the joint is dry. Moisture is the enemy of sealant adhesion. If there's any dampness, the sealant won't bond properly and will fail. Use a hairdryer on a low setting to dry the joint if needed.
Proper preparation takes 15-20 minutes but saves you from having to redo the job in a few months.
Step-by-Step Process for Sealing Joints
This is where precision matters. A well-applied seal kitchen worktop joints will look neat and last for years.
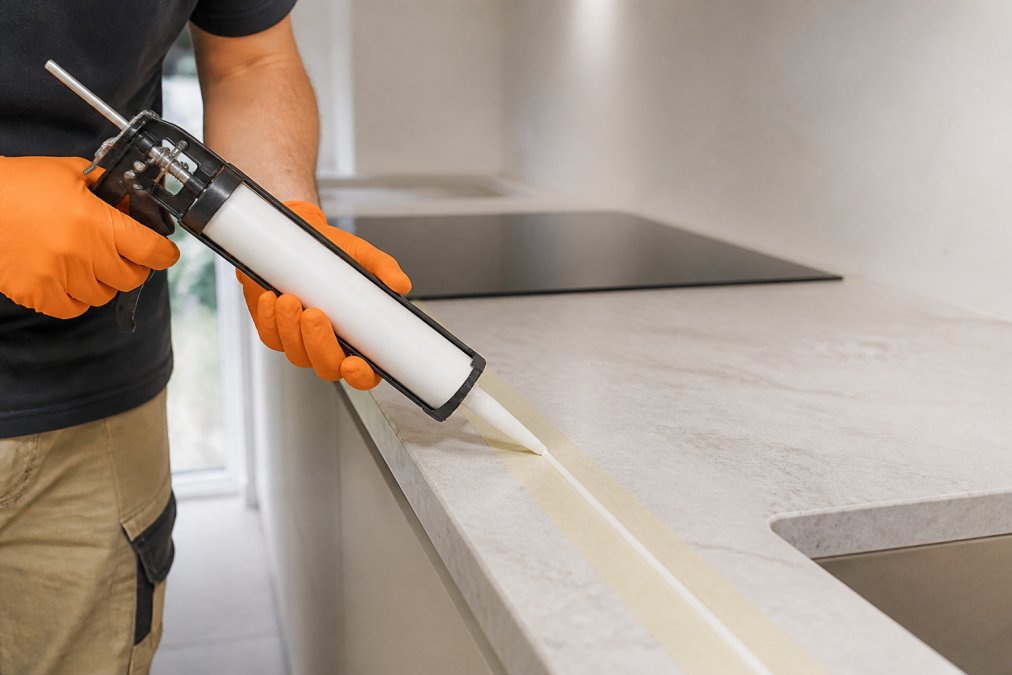
Step 1: Load the caulking gun. Insert the sealant cartridge into the gun with the nozzle facing forward. Cut the nozzle tip at a 45-degree angle, about 3-5mm from the end. A smaller opening gives you better control; a larger one covers more ground faster but is harder to control.
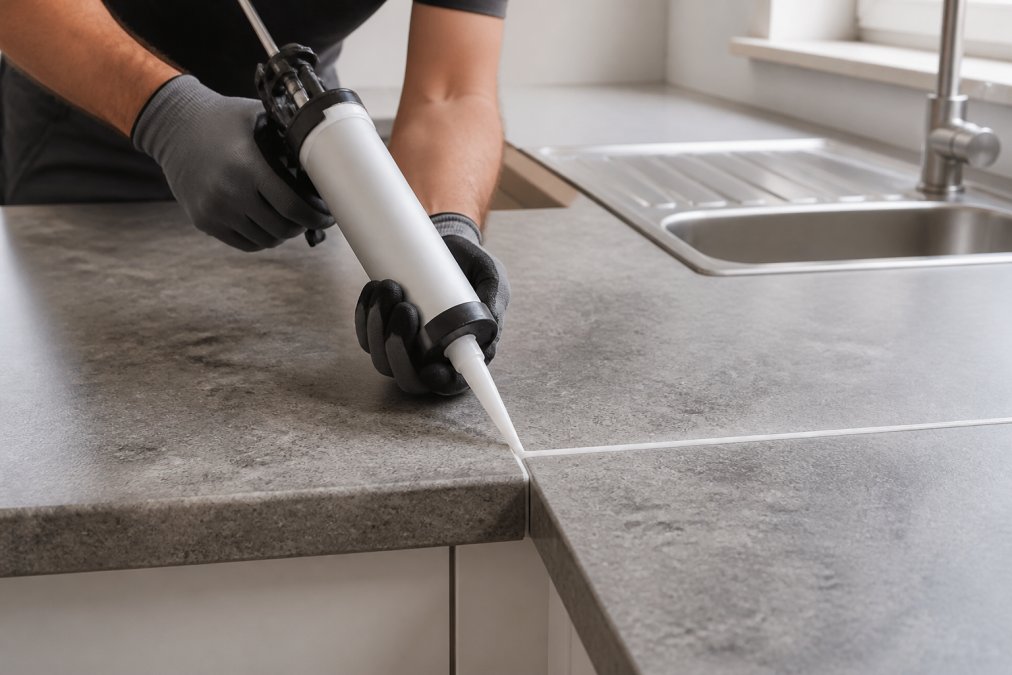
Step 2: Apply steady pressure. Position the caulking gun at a 45-degree angle to the joint. Squeeze the trigger with steady, even pressure. Move the gun along the joint in one smooth motion. Don't stop and start, this creates gaps and uneven lines.
Work at a pace that allows the sealant to fill the joint without overflowing. If you're moving too fast, sealant won't fill the gap properly. If you're moving too slowly, it'll pile up and be harder to smooth.
Step 3: Smooth the sealant. Immediately after applying the sealant (within 30 seconds), smooth it into the joint using a caulking tool, wet finger, or plastic spoon. Wipe along the joint in one direction, pressing the sealant down into the gap. This removes excess and ensures the sealant is fully seated.
Dampen your finger or tool slightly with water or soapy water, this prevents the sealant from sticking to your tool and makes smoothing easier.
Step 4: Remove the masking tape. Peel away the masking tape while the sealant is still slightly wet. This reveals a clean edge. If you wait until the sealant is fully cured, you risk pulling some of it away.
Step 5: Allow to cure. Most silicone sealants cure within 24 hours, though some take up to 48 hours (the NIH). Don't use the worktop or expose the joint to water during this time. Check the product instructions, curing times vary.
The entire process for a single joint typically takes 5-10 minutes, plus curing time.
How to Fix Swollen Kitchen Worktop
A swollen worktop is a sign that water has penetrated the substrate, usually because joints weren't sealed properly or the seal has failed. Fixing this depends on how severe the swelling is.
Minor swelling, If the worktop is slightly puffy but hasn't warped or separated, you may be able to arrest further damage by sealing the joints immediately. Dry the affected area thoroughly with a hairdryer, then seal all nearby joints to prevent more water ingress. This won't reverse the swelling, but it stops it from getting worse.
Moderate to severe swelling, If the worktop is visibly warped, has separated from the base units, or shows signs of delamination, the damage is usually permanent. The substrate has absorbed too much water and won't return to its original shape. In these cases, the worktop typically needs to be replaced.
However, if the damage is limited to a small area and the rest of the worktop is sound, you may be able to repair just that section. Surface Magic Repairs can assess whether a repair is viable or if replacement is the only option. Cosmetic repairs are intended to significantly improve damaged areas and restore their appearance and usability, although results depend on the material, finish, damage and surrounding pattern. Many property managers and homeowners are surprised to learn that a targeted repair is possible without replacing the entire worktop.
Prevention is far easier than repair. Seal all worktop joints properly from the start, and inspect them annually. If you notice any cracks or gaps in existing sealant, re-seal immediately. This simple maintenance prevents the costly water damage that leads to swelling.
Common Mistakes to Avoid When Sealing Worktop Joints
Most failures happen because of avoidable mistakes made during application or preparation.
Using the wrong sealant. Acrylic caulk is cheaper and easier to find, but it fails in kitchens. Silicone costs slightly more but lasts far longer. Don't cheap out on sealant, you'll be redoing the job within two years.
Skipping the cleaning step. Applying sealant over dirt, grease, or old residue means the new sealant won't bond properly. It'll sit on top of the surface and peel away when it gets wet. Always clean and dry the joint thoroughly before sealing.
Applying sealant to a wet joint. If there's any moisture in the gap, the sealant won't cure properly and will fail. Ensure the joint is completely dry before you start. Use a hairdryer if needed.
Not smoothing the sealant. Leaving the sealant lumpy or uneven looks unprofessional and creates weak spots where water can seep through. Smooth it immediately after application.
Removing masking tape too early or too late. Remove it while the sealant is still slightly wet, not fully cured. If you wait too long, you'll pull away some of the sealant. If you remove it too early, the sealant will be too soft and may collapse.
Applying sealant to joints wider than 5mm. Sealant is meant to seal gaps, not fill large voids. If your joint is wider than 5mm, fill it first with a flexible filler or backer rod, then seal over the top.
Ignoring existing damage. If your worktop is already swollen or shows signs of water damage, sealing the joints won't fix it. Address the underlying damage first, or the problem will continue.
Avoiding these mistakes means your seal will hold and your worktop will stay protected.
Maintaining Sealed Worktop Joints Long-Term
A properly sealed joint doesn't require much maintenance, but a little attention goes a long way.
Inspect annually. Once a year, look at your worktop joints. Check for cracks, gaps, or places where the sealant has pulled away from the edge. Early detection means you can re-seal before water starts to penetrate.
Wipe spills immediately. While sealed joints are waterproof, standing water can eventually find its way through if it sits long enough. Wipe up spills promptly, especially around the edges of the worktop.
Avoid harsh chemicals. Some cleaning products can degrade silicone sealant over time. Stick to mild soap and water or standard kitchen cleaners. Avoid bleach-based products if possible.
Re-seal every 5-10 years. Even the best silicone sealant eventually breaks down. If you notice the sealant is starting to crack, discolour, or pull away from the edges, it's time to re-seal. This is a straightforward job, remove the old sealant, clean, and apply new sealant following the same process.
Address water damage immediately. If you notice swelling, discolouration, or soft spots near a joint, investigate. These are signs that water has penetrated the substrate. Dry the area thoroughly and re-seal the joint. If the damage is already done, you may need professional help to assess whether repair or replacement is necessary.
Proper maintenance extends the life of your worktops and prevents costly repairs down the line. For rental properties or commercial spaces where multiple worktops need sealing, a planned maintenance schedule ensures nothing gets missed.
Sealing kitchen worktop joints properly is one of the most cost-effective ways to protect your investment. A properly sealed joint prevents water damage, extends worktop life, and keeps your kitchen or rental property looking professional. If you're managing multiple properties or have worktops that are already showing signs of damage, Surface Magic Repairs can assess the condition and recommend whether sealing, repair, or replacement is the best option. The team has experience with laminate, solid-surface, and other worktop materials across residential and commercial properties. GET AN INSTANT QUOTE to discuss your worktop condition and explore repair options that could save you thousands in replacement costs.
Frequently Asked Questions
Q: What is the best sealant for kitchen worktop joints?
A: Silicone-based sealants are often a reliable choice for kitchen worktop joints because they remain flexible, resist moisture and temperature changes, and create a durable waterproof barrier. Polyurethane sealants can also offer good adhesion and durability, particularly for laminate worktops. Avoid wood glue and standard caulk, as these absorb water and may fail quickly in kitchens where joints face constant moisture exposure. Choose a sealant specifically formulated for kitchen use that matches your worktop material.
Q: How do you stop water getting into worktop joints?
A: Proper sealing is the primary defence against water ingress. Clean joints thoroughly to remove debris and old sealant, then apply a continuous bead of kitchen-grade sealant along the entire joint. Ensure the sealant fully fills the gap and creates a smooth, even surface. After sealing, avoid exposing joints to standing water for at least 24 hours whilst the sealant cures. Regular maintenance, wiping joints dry after use and resealing as needed, keeps protection effective and helps prevent water damage that leads to swelling and deterioration.
Q: How often should you reseal kitchen worktop joints?
A: Most kitchen worktop joints benefit from regular inspection for signs of wear. The need for resealing depends on use and moisture exposure. High-traffic kitchens with frequent cleaning may need resealing sooner. Inspect joints regularly for signs of wear: cracking, shrinking, or discolouration indicate the sealant may be failing. If water sits on the joint or seeps into gaps, reseal immediately to help prevent swelling and structural damage. Prompt maintenance extends the life of your worktops and helps prevent costly water damage.
Q: Can you repair a swollen kitchen worktop joint?
A: Minor swelling caused by recent water exposure can sometimes be addressed by drying the joint thoroughly and resealing once it's completely dry. However, significant swelling indicates the worktop material has absorbed water and may be permanently damaged. In these cases, cosmetic repair techniques can improve the appearance and restore function without full replacement. Professional assessment can help determine whether the joint can be sealed and dried or whether the damaged section requires repair. Early action, sealing joints promptly and addressing water exposure quickly, helps prevent swelling from becoming a major issue.
This article was written using GrandRanker