Last Updated: November 3, 2026
Quick Summary
Send clear repair quote photos showing a wide shot of the whole item, close-ups of each area of damage and the surrounding surface. Use daylight from the side, avoid flash on glossy surfaces and add a coin for scale.
- Include one wide shot of the complete item, such as the full bath or worktop run.
- Take close-ups straight on, with the phone parallel to the damaged surface.
- Place a coin or tape measure beside the damage so its size is clear.
- Avoid direct flash on glossy surfaces, as it creates glare and hides detail.
- Send JPEG or PNG files, keeping the longest edge around 1,500 to 2,000 pixels.
Table of Contents
- Why Good Photos Matter for a Surface Repair Quote
- What Photos Are Needed for a Repair Quote
- How to Photograph Surface Damage Clearly
- Lighting, Focus and Camera Position
- Photographing a Worktop Burn or Chip
- Information Needed for a Repair Quotation
- Photo File Quality, Privacy and Safe Sharing
- What Photos Cannot Establish
- Sending Your Photos to Surface Magic Repairs for a Quote
- Frequently Asked Questions
Why Good Photos Matter for a Surface Repair Quote
A clear set of repair quote photos is often the fastest way to get an honest quotation. Surface Magic Repairs can assess many chips, scratches, burns and cracks from images, but only when the pictures show the damage, the item and the surrounding area clearly.
Poor photos slow the process down. A blurred, dark or cropped image can hide the depth of a chip or the extent of a crack, which means the assessment has to be based on guesswork or a follow-up visit. Good photos help the technician decide whether a repair is suitable and whether replacement would be the more durable choice.
Good photos also help you. Clear repair quote photos show exactly what needs fixing and give you a clearer picture of what the job involves. This matters most when you are managing several properties or a busy hotel and need to plan work around guests or tenants.
What Photos Are Needed for a Repair Quote
For most jobs, a small set of images covering three views is enough. Think of them as a simple checklist:
- A wide shot of the whole item, such as the full bath, worktop run or window frame
- One or more close-ups of each area of damage
- A shot showing the surrounding surface, so the colour, pattern and finish can be matched
Include a few extra angles where the damage is awkward to see. A chip on a bath edge may need a shot from above and one from the side. Send photos of any damage you are unsure about, too.
Also take a photo of any other damage in the same room or unit. Several small repairs can be easier to plan together.
How to Photograph Surface Damage Clearly
Take each photo with the damage in sharp focus and the whole area in frame. Follow these steps:
- Take a wide shot first. Stand back far enough to show the complete item and its position in the room.
- Move in for a close-up. Hold the phone parallel to the surface, not at an angle, and fill most of the frame with the damage.
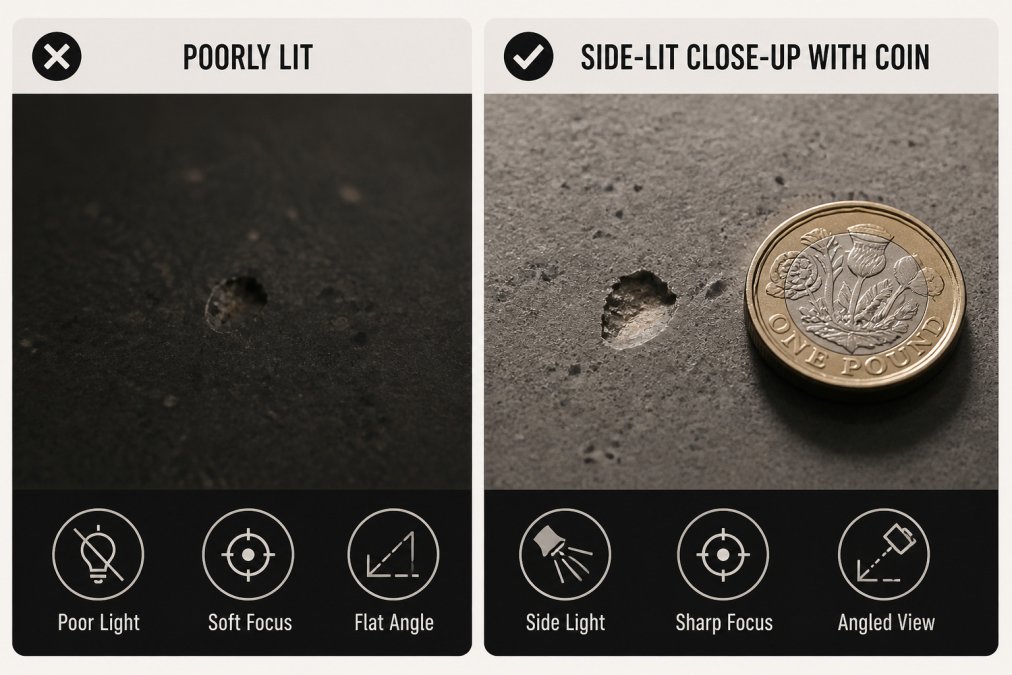
- Add a reference shot. Place a coin or a tape measure beside the damage so the size is clear. This is one of the simplest ways to show the size of a chip or scratch.
- Check each photo before moving on. Zoom in on your screen to confirm the edges of the damage are sharp.
Avoid heavy editing, as filters and crops can make a surface look different from how it really is.
Lighting, Focus and Camera Position
Light makes a bigger difference than most people expect. Daylight from a window, with the light coming from the side, shows texture and depth best. Avoid direct flash, which creates glare and washes out the detail of a chip or crack. If you must use flash, bounce it off a nearby wall rather than pointing it straight at a glossy surface.
Watch for reflections on glossy baths, worktops and glass. Move slightly so the reflection of a window, light fitting or yourself is not sitting over the damage. Shadows across the damage can also hide its edges, so turn on the room lights if daylight is poor. A common pattern is to take one shot with the room light on and one with it off, then keep whichever shows the damage more clearly.
Keep the camera steady. Rest your elbows on your body or lean against a wall to avoid blur. Tap the screen on the damaged area so the phone focuses there before you take the shot. If a photo looks blurred on your screen, retake it rather than hoping it will be clear enough.
A shot checklist for different damage types
Generic wide-and-close-up advice only goes so far. The shots that actually help an assessment change with the damage:
- Scratches: one shot looking straight down at the scratch, and one at a low angle with side light so the depth is visible. Include a coin beside the longest scratch.
- Chips: a straight-down close-up, a side-on shot showing the depth of the chip, and a wide shot showing where it sits on the item (for example, a bath edge or worktop corner).
- Cracks: a wide shot of the whole crack, a close-up of each end, and a shot showing whether the crack reaches an edge or a joint.
- Burns: a straight-down shot of the burn, a side-lit shot showing any blistering or lifting, and a wide shot of the worktop run so the position is clear.
- Dents and impact damage: a side-on shot with light raking across the surface, plus a straight-down shot. A low angle shows how deep the dent sits.
- Damage near an edge or joint: include a shot that shows the edge or joint itself, not just the damage.
- Scratched glass: photograph at an angle to the glass with a plain background behind it, because scratches often disappear in a straight-on shot.
Fixing common photo problems
If a photo comes out blurry, dark, reflective or incomplete, the fix is usually simple:
- Blurry: brace the phone, tap to focus, and take the shot again rather than zooming in afterwards.
- Too dark: move closer to a window or turn on the room light; avoid flash on glossy surfaces.
- Glare: change your position slightly, or shade the surface with your body without touching it.
- Incomplete: step back so the whole item is in frame, then take a second close-up.
Photographing a Worktop Burn or Chip
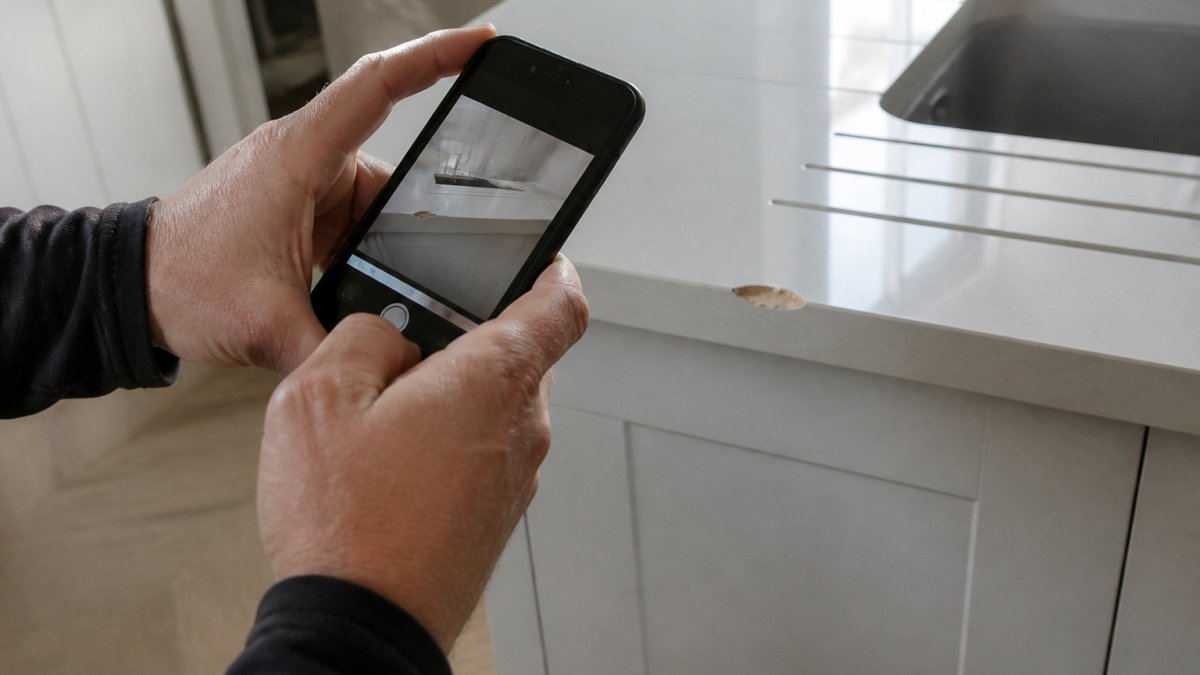
Burns and chips on laminate worktops are among the most common requests, and they are easy to photograph badly. Start with a wide shot of the full worktop run, so the position of the damage is clear. Then take a close-up straight down onto the burn or chip, with the light falling across it from the side.
Include a shot from a low angle if the chip sits on a corner or an edge. This helps show whether the damage goes through the surface or is only on top.
Showing the size of the damage
Use a coin, pen or tape measure beside the mark and take a close-up. This gives a reference point that the technician can use to judge the size without guessing. If you have a tape measure, lay it flat along the mark and photograph it from directly above.
Information Needed for a Repair Quotation
Photos are most useful when they come with the right details. Include the following with your images:
- Your full address and postcode, so availability can be checked
- The type of surface, such as bath, shower tray, laminate worktop, tile or uPVC
- A short description of how the damage happened, if you know
- The approximate number of separate areas of damage
- Any access issues, such as a tight bathroom or a building under occupation
- Whether the job is for a home, a rental property or a commercial site
- Your deadline, if you have one, such as a tenancy changeover or guest check-in
Cost depends on the surface, the damage, the location, access, the finish needed and the number of repairs, so these details help give a more useful response.
Photo File Quality, Privacy and Safe Sharing
Most phones produce images that are more than good enough. Use the standard camera setting rather than a low-resolution mode, and avoid heavy compression if your phone offers it. A useful rule of thumb is to keep the longest edge of the image at around 1,500 to 2,000 pixels, which is sharp enough to show the edge of a chip without producing a file too large to send.
Send photos as JPEG or PNG files where possible. Avoid sending screenshots, which lose detail, and avoid messaging apps that compress images heavily unless there is no alternative. If the upload service limits file size, reduce the size rather than the detail: a smaller image that is still sharp is better than a large one that is blurred. Check that your photos open properly on a computer before sending them.
Checking photos for privacy before you send
A photo of a bathroom or kitchen can reveal more than the damage. Before sending, check each image for:
- People in mirrors or reflective surfaces
- Personal documents, post or family photos in the background
- Number plates or house numbers visible through windows
- Location data embedded in the image file
Most phones let you strip location data when sharing, and many messaging apps do this automatically. If you are a tenant or a guest, check with the property owner or manager before sharing images of their property. Use secure upload links or a company email address rather than sending sensitive photos through an open social media message.
Photographing damage safely
Some of the most common repair jobs sit in awkward or risky places. Do not climb onto furniture, lean over wet baths or move heavy items to get a better angle. Photograph from where you can stand safely. A clear photo from a safe position is always more useful than a risky one.
- Baths and shower trays: photograph from the floor beside the item, not by standing in it.
- Worktops: stand back and use the room light rather than leaning across a hot hob.
- uPVC frames and high windows: photograph from the floor with the phone held up, rather than standing on a chair.
- Broken glass: do not put your hand or phone near sharp edges; photograph from a safe distance and note the damage in your message.
- Damaged doors or panels: check the item is stable before leaning close to it.
If the damage is in a commercial kitchen, on a roof or in any area with moving machinery or traffic, do not put yourself at risk to get the shot. A slightly imperfect photo taken safely is enough to start the conversation.
The article gives these photo file and sharing guidelines, which are worth checking before you send anything.
| Item | Recommended | Note |
|---|---|---|
| File format | JPEG or PNG | Avoid screenshots, which lose detail |
| Longest edge | About 1,500 to 2,000 pixels | Sharp enough to show a chip's edge |
| Camera setting | Standard, not low-resolution | Avoid heavy compression |
| Location data | Remove before sharing | Most phones can strip it |
| Check before sending | Mirrors, documents, number plates | Look for anything private |
| Tenants or guests | Check with owner or manager | Before sharing property images |
What Photos Cannot Establish
Photos are a useful starting point, but they have limits. A picture cannot show the depth of a crack beneath the surface, whether the damage extends into the substrate, or how the material will behave once the repair is carried out. Colour and texture can also look slightly different on a screen from how they appear in person.
Some surfaces need a site visit before a firm decision can be made, particularly if the damage is structural or the material is unusual. Surface Magic Repairs aims to be honest if photos are not enough to judge whether a repair is suitable. Do not pay for work you are unsure will hold up; ask for advice first.
Sending Your Photos to Surface Magic Repairs for a Quote
When your photos are ready, send them with your address, postcode and a short description of the damage. Include one wide shot, one or more close-ups and a reference shot for size. You can contact the team on 0800 085 7773 during office hours, Monday to Friday, 9:00am to 3:00pm, or through the Surface Magic Repairs website at surfacemagicrepairs.co.uk.
If you are unsure whether your photos are clear enough, send them anyway. Ask the team whether your photos are enough or whether a further image is needed.
Frequently Asked Questions
What photos should I send for a surface repair quote?
Send a wide shot of the complete item, one or more close-up photographs of the damage, and a photograph showing the surrounding area so the repair can be matched to the existing finish. A photograph from a short distance with a coin or ruler beside the damage helps show its size. Include your full address and postcode with the images so availability can be checked. Clear, sharp, well-lit photographs give the best chance of an accurate initial assessment, although suitability is always confirmed by Surface Magic Repairs.
Can I get a repair quote from photos alone?
In many cases an initial assessment and quotation can be made from clear photographs, particularly where the damage is visible and the item is accessible. However, photos cannot show everything. The depth of a crack, the condition of the material underneath, or how the surface feels may only become clear on inspection. Where the photographs leave questions, Surface Magic Repairs will say so and may ask for additional images before giving an estimate.
How can I show the size of a chip or crack in a photo?
Place a common object of known size, such as a coin, beside the damage and photograph it at the same distance and angle as the damage itself. Take one photograph with the object and one without, so the surface can be seen clearly. Avoid zooming in so far that the surrounding area disappears, as this makes it hard to judge where the damage sits on the item.