Table of Contents
- What You'll Need Before You Replace Kitchen Worktops
- How to Remove Old Laminate Worktops Safely
- Step-by-Step: Fitting Your New Worktop
- Common Mistakes to Avoid When Replacing Kitchen Worktops
- The Cost of Replacing Kitchen Worktops
- Repair vs Replace Kitchen Worktops: Which Makes More Sense?
- Frequently Asked Questions
Last Updated: August 30, 2026
Deciding to replace kitchen worktops looks straightforward until you're halfway through it. This guide walks you through the full process, from tools to final sealant, so you can approach the job with a clear plan.
A laminate worktop replacement is achievable for a competent DIYer. The challenge isn't any single step; it's the sequence. Get the order wrong and you'll be redoing work you've already done.
What You'll Need Before You Replace Kitchen Worktops
Preparation separates a clean job from a costly one. Gather everything before you disconnect a single pipe.
Tools:
- Tape measure and pencil
- Jigsaw with a fine-tooth blade
- Circular saw or track saw (for long straight cuts)
- Router (for post-formed edge joins, if applicable)
- Worktop jig (for joining two sections at a corner)
- Utility knife
- Chisel and mallet
- Cordless drill and screwdriver bits
- Sealant gun
- Adjustable spanner and basin wrench
Materials:
- Replacement worktop sections (measure twice, order once)
- Worktop connector bolts
- Silicone sealant (kitchen-grade, mould-resistant)
- Worktop adhesive or grab adhesive
- Sandpaper (80-grit and 120-grit)
- Masking tape
- End-cap strips or edge banding
- PTFE tape (for water connections)
Safety equipment:
- Safety glasses
- Ear defenders
- Work gloves
- Dust mask (rated FFP2 or higher for MDF and laminate dust)
Check your base unit carcasses before ordering. If they're bowed, out of level, or damaged, a new worktop will cause problems from day one. A spirit level across all units will reveal whether you need to pack any level first.
According to guidance from the Health and Safety Executive on woodworking dust, fine dust from MDF and laminate carries health risks with repeated exposure. A well-fitted FFP2 dust mask is essential when cutting these materials indoors.
How to Remove Old Laminate Worktops Safely
Removing an existing worktop without damaging the units below is often underestimated. Laminate worktops are typically secured by screws from inside cabinets and held by silicone along the wall and around the sink. The silicone is often the harder problem.
Disconnecting the Sink and Hob First
Turn off the water supply at the isolation valves under the sink. If your kitchen lacks isolation valves, turn off at the stopcock. Have a towel and bucket ready for residual water in the trap and supply lines.
For a gas hob, call a Gas Safe registered engineer. Disconnecting gas appliances yourself is illegal under the Gas Safety (Installation and Use) Regulations 1998. For an electric hob, isolate the circuit at the consumer unit and confirm it's dead with a voltage tester before disconnecting.
Once utilities are isolated:
- Disconnect the waste trap from the sink outlet
- Disconnect the hot and cold supply flexi-hoses from the tap tails
- Unscrew the sink clips from below (usually 6-8 clips around the perimeter)
- Lift the sink clear and set it aside
Cutting Through Sealant and Releasing Fixings
Open cabinet doors and locate the screws securing the worktop to the carcasses. These are usually driven upward through metal brackets or wooden blocks inside each unit. Remove every one before attempting to lift the worktop.
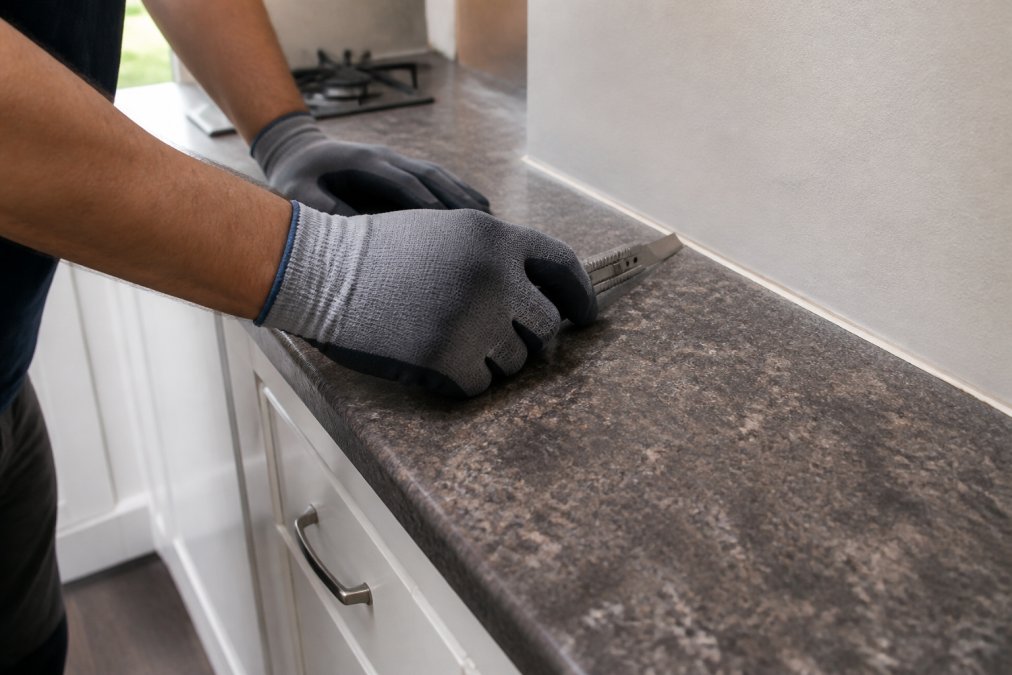
Score the silicone bead along the wall firmly with a utility knife, then work a wide chisel or dedicated sealant removal tool along the joint to break the bond. Take your time here. Forcing the worktop up before sealant is fully released will pull plaster from the wall or chip tiles.
For mitred corner joints held with worktop connector bolts, access these through the cabinet below and undo the bolts fully before separating sections.
Step-by-Step: Fitting Your New Worktop
The fitting sequence matters as much as cutting. Work methodically and dry-fit every section before applying adhesive or sealant.
Measuring, Marking and Cutting to Size
Measure the run from wall to wall at three points: front, middle, and back. Walls are rarely perfectly square, and a measurement taken only at the front leaves a gap at the back. Use the shortest measurement as your worktop depth and scribe to the wall if necessary.
Mark cut lines clearly with masking tape on the top surface before scribing. Cutting laminate face-down with a jigsaw avoids tear-out on the top surface, or use a circular saw face-up with a fine-tooth blade designed for laminates.
For sink cutouts:
- Mark the cutout using the template supplied with the sink, or the sink itself
- Drill a starter hole inside the waste area, large enough for the jigsaw blade
- Cut slowly and support the offcut as you finish, so it doesn't drop and crack the edge
For corner joins, a worktop jig is the right tool. It routes a precise mitre that pulls tight with connector bolts. Attempting a corner join by hand almost always results in a visible gap.
According to the Chartered Institute of Building's guidance on kitchen fit-out quality, precise measurement and dry-fitting before fixing are the two practices most consistently associated with first-fix quality in domestic fit-out work.
Securing, Sealing and Finishing the Edges
Dry-fit the worktop sections and check the fit along the wall, at every corner, and around cutouts. Adjust before committing to fixings.
Apply a thin bead of silicone or grab adhesive to the top of each carcass rail before lowering the worktop into position. This prevents movement and stops moisture entering the carcass top. Screw up through cabinet brackets to secure, but don't overtighten. Laminate worktops can crack if fixings are torqued too hard.
For the wall joint:
- Apply kitchen-grade silicone sealant along the full length of the back edge
- Smooth with a wet finger or sealant tool
- Leave undisturbed for the cure time stated on the product (typically 24 hours for full cure)
Finish exposed ends with matching end-cap strips, applied with a hot iron if iron-on edging, or with contact adhesive for thicker post-formed caps. Trim flush with a sharp utility knife and sand lightly with 120-grit paper.
| Task | Key Tool | Common Mistake |
|---|---|---|
| Measuring the run | Tape measure | Taking only one measurement |
| Cutting to length | Circular saw / jigsaw | Wrong blade direction causing tear-out |
| Corner joins | Worktop jig | Attempting freehand mitre |
| Sink cutout | Jigsaw with starter hole | Letting offcut drop and crack edge |
| Sealing wall joint | Sealant gun | Insufficient cure time before use |
| Securing to carcasses | Cordless drill | Overtightening and cracking laminate |
Common Mistakes to Avoid When Replacing Kitchen Worktops
Most problems after worktop replacement trace back to a handful of errors.
Not accounting for wall irregularities. Scribing to an uneven wall takes time, but skipping it leaves a gap that collects moisture. Use a compass to transfer the wall profile onto the worktop, then plane or sand to the line.
Skipping the dry-fit. Applying adhesive then discovering the section is 10mm too long is avoidable. Always dry-fit, clamp, and check before committing.
Using the wrong sealant. Standard clear silicone is not appropriate for kitchen worktops. Use a kitchen-grade, mould-resistant product. The difference in performance over two to three years is significant.
Leaving exposed MDF edges unsealed. Cut edges on laminate worktops expose the MDF core. Any moisture reaching an unsealed edge will cause the board to swell. Apply edge banding or seal cut edges with PVA before fitting.
Rushing the silicone cure. Running water over freshly applied silicone before it cures will wash out the sealant and leave a gap. Check the manufacturer's stated cure time and stick to it.
The Cost of Replacing Kitchen Worktops
The cost of replacing kitchen worktops varies depending on material, run complexity, and whether you're doing the work yourself or hiring a fitter.
Laminate is the most affordable option. Solid wood, quartz, granite, and Corian sit at progressively higher price points. Quartz and granite must be cut and fitted by specialist stone fabricators; attempting this with standard woodworking tools is not feasible.
Labour costs for professional fitting vary by region and job complexity. A straightforward laminate replacement across a standard kitchen run is typically a day's work for an experienced fitter. Corner joins, integrated sink cutouts, and hob cutouts add time.
For accurate pricing on your project, get at least three quotes from local kitchen fitters and compare like for like. The Federation of Master Builders' guidance on getting fair quotes recommends requesting itemised quotes so you can compare material costs and labour separately.
If you're replacing a worktop because of a burn, deep scratch, or localised staining, the cost of full replacement may be significantly higher than professional repair.
Repair vs Replace Kitchen Worktops: Which Makes More Sense?
The decision to repair or replace comes down to three factors: damage extent, the age and condition of the surrounding surface, and the total cost of each option.
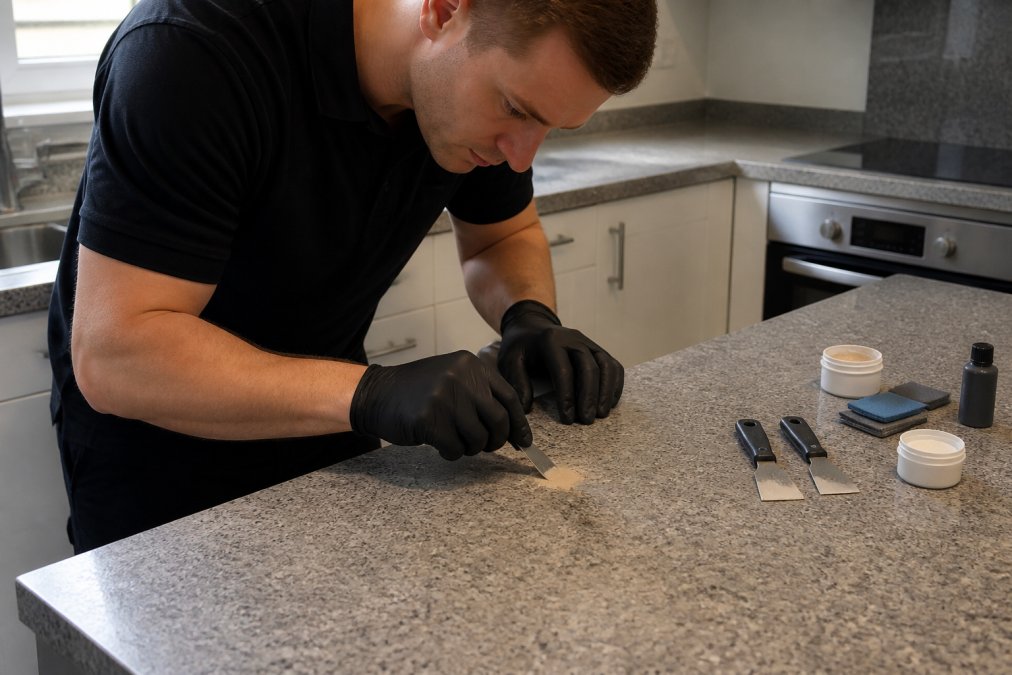
Repair makes sense when damage is localised. A single burn mark, chip at the edge, deep scratch, or small area of delamination are candidates for professional cosmetic repair. The worktop structure is sound; only the surface finish is compromised. A specialist can fill, colour-match, texture, and refinish the damaged area in place without strip-out.
Replace makes more sense when damage is widespread, the worktop is structurally compromised (swollen MDF, delaminating across a large area), or the surface is at the end of its useful life.
For a single burn mark or chip on an otherwise good worktop, replacement is almost always more expensive and disruptive. Surface Magic Repairs specialises in in-situ cosmetic repair on laminate and solid-surface worktops, restoring appearance without the cost and downtime of full replacement. A professionally repaired surface can significantly improve appearance and usability.
For landlords and facilities managers, the calculation is straightforward. A professional repair between tenancies costs a fraction of full replacement and can be completed in hours rather than days.
As noted in guidance from the Chartered Institute of Housing on property maintenance standards, minimising unnecessary replacement of functional building components is both a cost-control measure and an environmental consideration for responsible property management.
Surface Magic Repairs has repaired over 46,000 surfaces in the past year across domestic and commercial settings, with an approach that starts with honest assessment of what's achievable.
Replacing a kitchen worktop is manageable when you plan properly, but shortcuts create problems that outlast the renovation. If your worktop has localised damage rather than widespread failure, Surface Magic Repairs offers professional in-situ repairs to laminate and solid-surface worktops with no strip-out required, colour and finish matched to the existing surface, and fast turnaround for both homeowners and commercial clients. Get an instant quote and find out whether repair is the smarter option before committing to full replacement.
Frequently Asked Questions
Q: Can you replace kitchen worktops without changing the cupboards?
A: Yes, in most cases you can replace kitchen worktops without touching the cupboard units beneath. The worktop sits on top of the carcasses and is held in place by brackets and sealant. As long as the units are structurally sound and level, a new worktop can be cut to fit and secured in place. This is one reason worktop replacement is popular during partial kitchen refreshes, though it does still require disconnecting the sink and any integrated hob.
Q: How long does it take to replace kitchen worktops?
A: A straightforward laminate worktop replacement in an average kitchen typically takes one to two days. This accounts for removal, templating, cutting, fitting and allowing silicone sealant to cure fully before the sink is used again. More complex materials such as granite or quartz require templating on a separate visit before fabrication, which can extend the overall timeline to a week or more. Cosmetic repairs to existing worktops, by contrast, are usually completed within a few hours.
Q: What is the cheapest way to replace kitchen worktops?
A: Laminate worktops are the most affordable replacement option and are widely available from builders' merchants and DIY retailers. Fitting them yourself reduces labour costs further, though you will need a jigsaw, router and accurate measurements. Before committing to replacement, it is worth getting a professional assessment of the damage. Chips, burns and scratches on laminate or solid-surface worktops can often be repaired in situ for significantly less than the cost of full replacement, with no need for knock-on decorating or tiling work.
Q: Is a worktop repair a permanent fix or just a temporary patch?
A: A professional cosmetic repair carried out by a trained technician is not a temporary patch. Using specialist fillers, colour-matching and surface finishing techniques, a repaired area is durable and designed to withstand everyday use. Results depend on the material, the extent of the damage and the surrounding finish. A realistic assessment before work begins ensures you understand what to expect. For busy kitchens in rental or commercial settings, professional repairs regularly extend worktop life by several years.
This article was written using GrandRanker