Quick Summary
Repairing damaged wood trim in place is usually the most cost-effective option. Identify the damage type, fill chips and gouges with epoxy or flexible filler, sand smooth, prime and paint, then check that the timber underneath is sound.
- Repair in place avoids strip-out, making good and redecorating surrounding walls.
- Press a screwdriver into the timber; if it sinks in easily, the wood is rotten and a repair will not hold.
- Use two-part epoxy filler for chips and edges, and build deep gouges up in layers.
- Fix the moisture source before repairing rot, or the new filler will fail again.
- Seal filler with primer before painting, or it will absorb paint unevenly and show through.
Table of Contents
- Why Repairing Wood Trim Often Beats Replacing It
- Assessing the Type and Extent of Trim Damage
- How to Repair Damaged Wood Trim Step by Step
- Repairing Chipped Wood Trim Without Replacing the Piece
- Repairing Rotten Wood Trim: When a Repair Is Still Sensible
- Choosing Fillers and Matching the Finish
- Wood Trim Repair Cost Factors to Weigh Up
- Booking Your Wood Trim Repair or Requesting a Quotation
- Frequently Asked Questions
Cost Effective Ways to Repair Damaged Wood Trim
Last Updated: November 2, 2026
Why Repairing Wood Trim Often Beats Replacing It
Wood trim is one of the most cost-effective parts of a home to fix rather than replace. A chipped door architrave or a dented skirting board can usually be restored in place for far less than the cost of stripping out and refitting new timber. Many homeowners and landlords assume the only option is replacement. Often it is not.
Repair makes sense for three reasons. First, the material you already have stays in place, so there is no strip-out and no knock-on decorating or making good around the surrounding walls. Second, a repair creates far less waste going to landfill. Third, it is generally quicker than a full replacement.
Repair is not always the right answer, though. Where the timber has lost its structure or the damage runs through the full section, replacement is the sensible choice. The rest of this guide explains how to tell the difference and when to call in a professional.
Assessing the Type and Extent of Trim Damage
Before you buy any filler or sandpaper, look closely at the damage. Most wood trim problems fall into a few groups:
- Surface marks: scuffs, scratches and light dents that have not broken the grain
- Chips and knocks: small pieces missing from edges, corners or mouldings
- Gouges: deeper channels cut into the timber, sometimes with splintered edges
- Rot or moisture damage: soft, spongy or crumbling wood, often near windows, doors or floors
- Structural failure: trim that has cracked through, pulled away from its fixings or lost a supporting section
Press a screwdriver gently into the timber in several places. If it sinks in easily, the wood may be rotten and the repair will not hold. Sound timber resists the tip.
Also check the cause. A chip caused by a vacuum cleaner is a one-off. Repeated damage to the same spot, or swelling and flaking paint, usually points to moisture or an underlying fixing problem. Fix that first, or the repair will fail again. Failing grout or sealant around trim and tiles is often linked to the same moisture, and you can learn more in this guide to repairing tile grout.
Quick decision guide:
- Solid timber with small chips or dents: repair in place
- Deep gouges with sound wood around them: repair with epoxy or a dense filler
- Soft or crumbling timber: replace the affected section
- Trim that has lost its fixings or cracked through: refit or replace
How to Repair Damaged Wood Trim Step by Step
The general method is the same for most jobs: prepare, fill, shape, sand and finish. Work in this order, and do not rush the preparation, because it decides how long the repair lasts.
Preparing the Surface and Removing Loose Material
Start by removing anything that is loose or damaged. Use a chisel or a sharp scraper to take off splintered edges and flaking paint. Work with the grain rather than against it, and keep your strokes light so you do not widen the damage.
Clean the area with a dry brush or a lightly dampened cloth, then let it dry fully. Filler will not bond to dust, grease or damp wood. Wear eye protection when chiselling, and a dust mask when sanding old paint, as older paint can contain lead.
Where the edges of a chip are sharp or uneven, lightly sand them so the filler has a clean, slightly rough surface to grip. Do not sand the whole piece, only the area you are repairing.
Filling Chips, Dents and Small Gouges
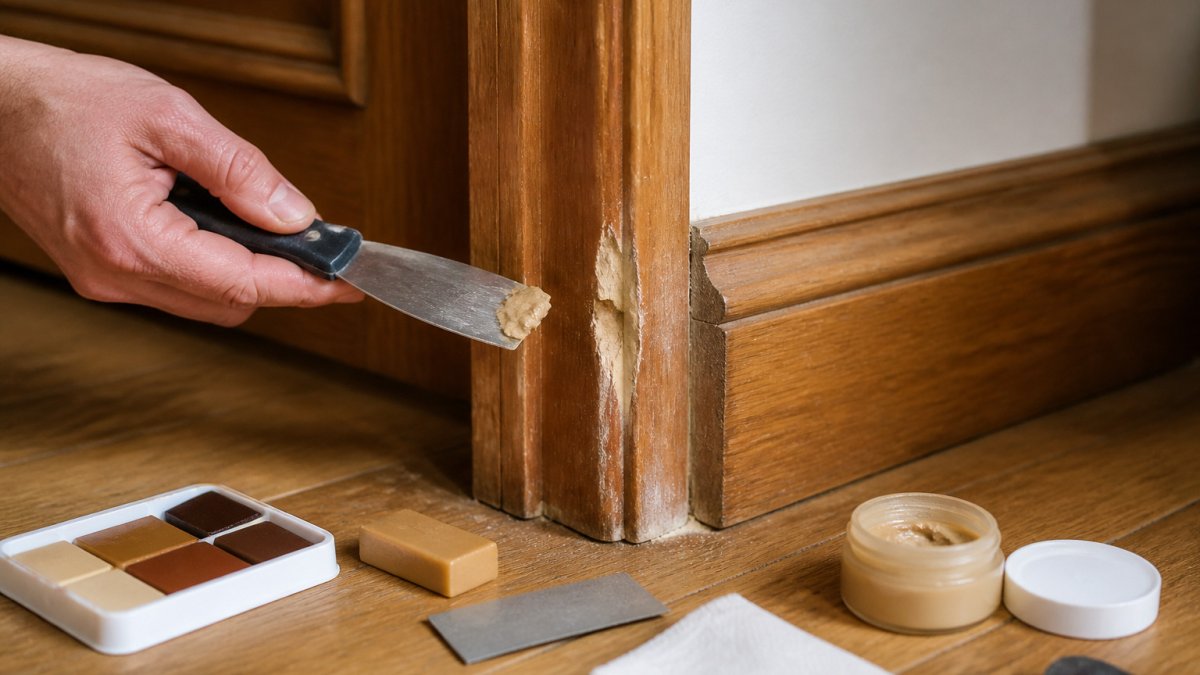
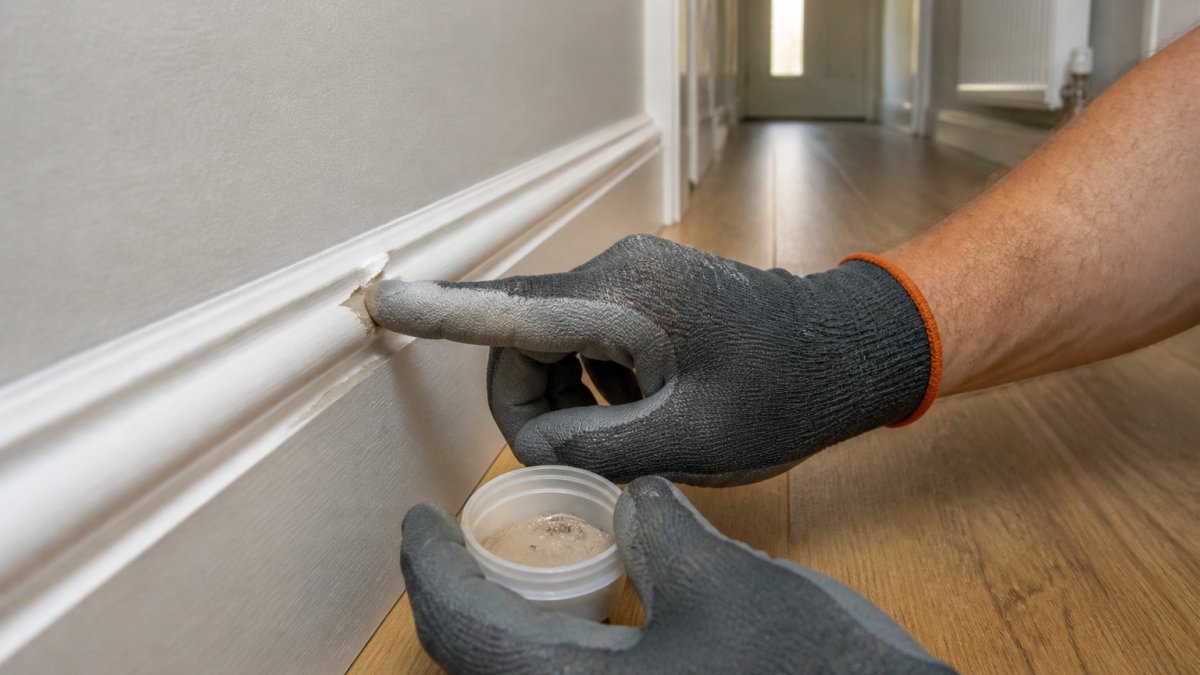
Choose a filler suited to the job. For small dents and surface marks, a flexible wood filler is fine. For deeper gouges or missing sections, use a two-part epoxy filler, which is stronger and holds its shape better.
Press the filler firmly into the damage with a putty knife. Slightly overfill the area, because most fillers shrink a little as they cure. Smooth the surface with the knife so the filler sits flush with the surrounding wood. Leave it to cure fully. Check the packaging, because drying times vary from under an hour to several hours.
Once cured, sand the filled area with fine-grit paper. Sand gently and check the surface often. You want the repair to feel the same as the timber around it, with no visible edge.
Repairing Chipped Wood Trim Without Replacing the Piece
Chipped trim is one of the most common problems, and it is usually the easiest to repair. The key is to rebuild the missing shape, not just fill the hole.
Steps for a chipped corner or edge:
- Clean and dry the chipped area, as described above.
- Mix a small amount of two-part epoxy, following the instructions exactly.
- Build up the missing shape in layers if the chip is deep. Let each layer cure before adding the next.
- Use the putty knife to shape the repair to match the original profile of the moulding.
- Once cured, sand gently until the edge matches the rest of the trim.
Matching the profile matters more than most people expect. A flat patch on a rounded moulding will look wrong even when it is smooth. If you cannot shape the repair accurately, a moulding profile tool or a small amount of careful sanding can help.
Watch out: Do not paint over an unsealed filler. Seal the repair with a primer first, or the filler will absorb paint unevenly and show through.
Repairing Rotten Wood Trim: When a Repair Is Still Sensible
Rot needs more care. Small patches of surface rot can sometimes be repaired, but only if the underlying timber is still firm. Dig out all the soft wood until you reach sound material. Any rot left behind will spread under the new filler and cause the repair to fail.
A repair is still sensible when the rot is confined to a small area, the timber around it is solid, and the source of moisture has been dealt with. Fix the leak, the failed seal or the damp source first. Then rebuild the area with a suitable epoxy repair compound.
If the rot runs along the length of the trim, reaches the fixings, or affects the structure behind it, replace the section. Filler cannot hold up a trim that has no firm support beneath it.
Moisture is the root cause in most rot cases. Check the seals around windows and doors, look for condensation, and make sure outside ground does not sit against timber. This is the cheapest way to stop the damage coming back.
Choosing Fillers and Matching the Finish
The right filler depends on where the damage is, how big it is and whether the trim will be painted or left with a visible grain. Getting this wrong is the most common reason a repair fails within a year.
Match the filler to the damage:
- Small dents, scuffs and nail holes on interior painted trim: a flexible decorator's filler is fine. It is cheap, easy to sand and easy to paint. It is not strong enough for edges or corners that take knocks.
- Chips and missing sections on edges and corners: a two-part epoxy filler is the better choice. It sets hard, holds a shape and resists impact better than ordinary filler. It is also more difficult to sand, so shape it carefully while it is still workable.
- Deep gouges or sections where the profile has been lost: build up in layers with epoxy, letting each layer cure before the next. A single thick fill is more likely to shrink, crack or pull away.
- Exterior trim or trim in damp areas: use a filler rated for exterior use, and make sure the timber is sound and dry before filling. Ordinary interior filler will absorb moisture and fail.
- PVC or uPVC trim: wood filler is not the right product. These surfaces need a repair method suited to the material, and a professional assessment is sensible before attempting a DIY fill.
Durability matters more than ease of use. A flexible filler is pleasant to work with, but it is not structural. If the repair is on a door edge that gets knocked, a skirting board in a hallway or a corner that takes impact, epoxy will last longer. If the repair is a cosmetic dent in a bedroom, the simpler filler is perfectly adequate and cheaper.
Matching the finish:
Painted trim is the easiest to match. Prime the repair first, then apply two thin coats of paint matched to the existing colour. Thin coats dry more evenly than one thick coat and show fewer brush marks. Test a small patch first, because paint can look different on filler than on timber.
Stained or varnished trim is harder. A perfect match is rarely possible on a repair, so aim to blend rather than match exactly. Try to carry the grain direction through the repair, and test the stain on an offcut or a hidden area before applying it to the visible repair. A coloured wax or grain pen can help blend the edges after the stain has dried.
Watch out: Do not paint over an unsealed filler. Seal the repair with a primer first, or the filler will absorb paint unevenly and show through as a dull patch.
If the trim is stained, varnished or a complex profile, and you want the repair to disappear, that is the point where a professional finish is worth considering. Surface Magic Repairs colour matches and refinishes repaired areas to blend with the surrounding surface, and will advise honestly if a repair is unlikely to match well enough to be worth doing.
The table below sets out which filler suits each type of damage, using the points made in this section.
| Damage | Best filler | Key point |
|---|---|---|
| Small dents and nail holes on painted interior trim | Flexible decorator's filler | Cheap, easy to sand and paint |
| Chips and missing edges or corners | Two-part epoxy filler | Sets hard and resists impact |
| Deep gouges or lost profile | Epoxy built up in layers | Single thick fill is likely to crack |
| Exterior or damp-area trim | Exterior-rated filler | Interior filler absorbs moisture and fails |
| PVC or uPVC trim | Not wood filler | Needs a material-specific method |
Wood Trim Repair Cost Factors to Weigh Up
Repair is usually cheaper than replacement, but the gap narrows when the damage is widespread or the cause has not been fixed.
Start by comparing like with like. A replacement quote normally includes removal of the old trim, disposal, new timber or MDF, fitting, filling and sanding of fixing holes, priming and painting. A repair quote normally includes preparation, filling or splicing, shaping, sanding, priming and finishing the affected area only. The repair is smaller in scope, but it still involves a skilled visit, so the saving comes from avoided strip-out and avoided redecoration of surrounding walls, not from the repair being trivial.
What pushes a repair cost up:
- Number of separate damaged areas. One chipped architrave is a small job. Ten dented skirting runs around a rental property is a programme, and it is priced accordingly.
- Profile complexity. A plain square-edge skirting is quick to fill and shape. A deep ogee or torus moulding takes longer because the profile has to be rebuilt accurately.
- Finish. Painted trim is the cheapest to finish because the repair can be primed and painted to match. Stained or varnished trim takes longer because the grain and colour have to be blended, and a poor match is more visible.
- Access. Trim at height, behind radiators, in stairwells or in tight corners adds time. So does working in an occupied room that has to be protected and cleared.
- Moisture or rot. If the cause has to be addressed first, the total cost rises. A repair over active damp will fail, so the damp has to be sorted before any filler goes in.
- Material. Solid timber, MDF and PVC behave differently. MDF edges crumble when damaged and need careful rebuilding. PVC trim does not take wood filler well and may need a different approach.
What pushes a replacement cost up:
- Matching the existing profile. If the moulding is old or non-standard, a replacement may need to be machined to match, which adds cost.
- Making good. Removing trim often damages plaster, wallpaper or paint edges, so replacement usually brings decorating with it.
- Disruption. In an occupied home or a let property, replacement means more time, more dust and more coordination.
- Disposal. Old timber and packaging have to be taken away, which is a cost in itself.
A sensible rule of thumb: if the damage is confined to one or two areas, the timber around it is sound, and the finish is painted, repair is almost always the cost-effective choice. If the damage runs along a length of trim, the timber is soft or the profile is complex and stained, get both a repair and a replacement view before deciding.
Cost depends on the surface, the damage, the location, access, the finish and the number of repairs. Surface Magic Repairs will give an honest assessment before any work is booked, and will say plainly if replacement would be more durable. Send clear photographs of the damage, the complete piece of trim and the surrounding area, together with your full address and postcode, and you can request a quotation.
Booking Your Wood Trim Repair or Requesting a Quotation
If the damage is beyond a simple DIY job, or you would rather have a professional finish, Surface Magic Repairs can assess the work and provide a quotation. Repairs are normally completed on site, with the repaired area colour matched and refinished to blend with the surrounding surface.
To get the most accurate assessment, send:
- Clear photographs of the damage, the complete piece of trim and the surrounding area
- A note of the material, if you know it (painted timber, stained wood, MDF or PVC)
- Your full address and postcode
Surface Magic Repairs will tell you honestly whether a repair is suitable or whether replacement would last better. Call 0800 085 7773 or visit surfacemagicrepairs.co.uk to get started. Our office is open Monday to Friday, 9:00am to 3:00pm.
Frequently Asked Questions
How do you repair damaged wood trim?
Start by removing loose or splintered material and cleaning the area. Fill small chips and gouges with a suitable wood filler, or use a two-part epoxy filler for deeper damage. Once the filler has cured, sand it level with the surrounding trim, prime it and finish with paint that matches the existing colour. Larger or structural damage may need a section of timber replaced rather than filled, and it is worth having a specialist assess the piece before committing to a DIY repair.
Can rotten wood trim be repaired, or does it need replacing?
Light surface rot can sometimes be repaired if the timber underneath is still firm. Whether rot can be repaired depends on the condition of the timber underneath, and an assessment is the best way to establish this. Where rot has spread, replacing the section is often the more durable choice.
What is the best filler for damaged wood trim?
The suitable filler depends on the size of the damage, where it sits and whether it will be painted or left visible. A professional assessment can confirm the best approach for your trim.
When should damaged wood trim be replaced rather than repaired?
Replacement is usually the better option when the damage is extensive, the trim is structurally unsound, or the wood is rotten through to the core. It also makes sense where the profile is broken across a long run, or where a repair would be visible and impossible to blend with the surrounding finish. Compare the likely cost of repair and the time it takes with the cost of a like-for-like replacement piece and fitting before deciding.