Table of Contents
- Can Deep Burn Marks on Laminate Worktops Be Repaired?
- What You'll Need Before You Start
- Using a Laminate Worktop Repair Kit
- How Long Does a Laminate Repair Take?
- Cost of Professional Worktop Repair vs DIY
- When to Call a Professional
- Common Mistakes to Avoid
- Preventing Future Burn Marks
- Frequently Asked Questions
Last Updated: August 31, 2026
Can Deep Burn Marks on Laminate Worktops Be Repaired?
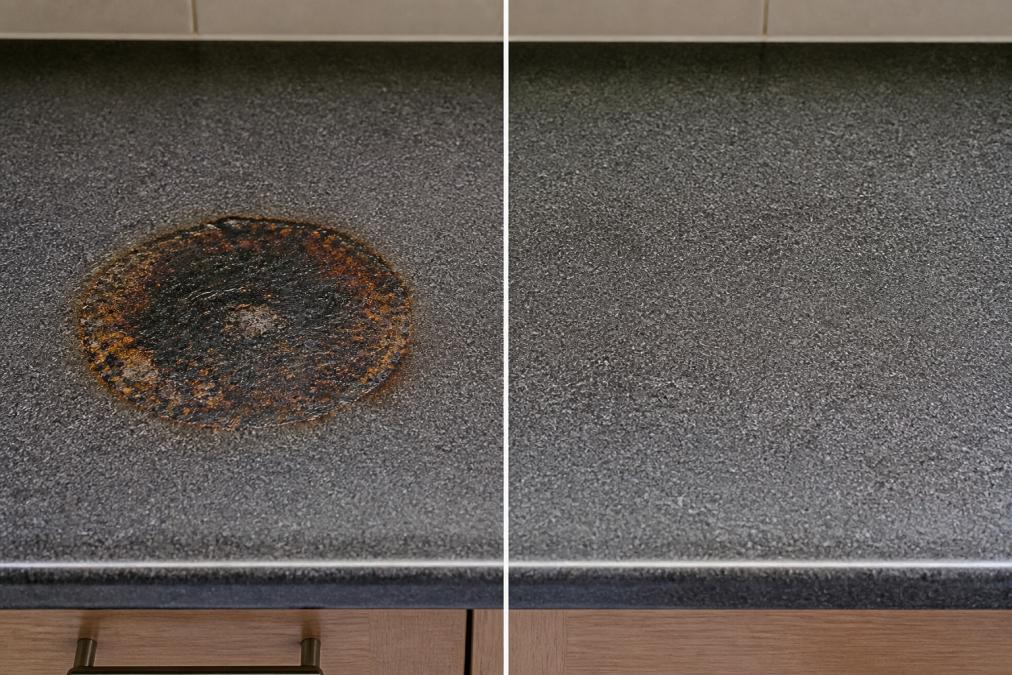
Yes, deep burn marks on laminate worktops can often be repaired successfully using specialist filling and refinishing techniques. The key question isn't whether repair is possible, but whether the damage depth makes repair more practical than replacement.
Laminate is a layered material made from paper, resin, and a decorative surface layer. When heat scorches through the decorative layer into the substrate, specialist repair methods can fill, colour-match, and refinish the area to restore appearance and usability. A deep burn that penetrates the substrate will never be completely invisible, but it can be restored to a condition where it no longer catches the eye or compromises function.
Deep burns are absolutely repairable. The decision between repair and replacement usually comes down to cost, disruption, and damage visibility. Repair keeps your existing worktop in place, avoids removal and reinstallation mess, and typically costs a fraction of replacement. But if the burn is extensive, affects multiple areas, or sits on a busy pattern where colour-matching is difficult, replacement might be the cleaner solution.
What You'll Need Before You Start
Essential Tools and Materials
Repairing deep burn marks requires specific tools and materials.
Essential tools:
- Putty knife or scraper (flexible, not rigid)
- Fine-grit sandpaper (220-400 grit for final finishing)
- Coarser sandpaper (80-120 grit for initial preparation)
- Laminate repair filler or epoxy putty
- Colour-matching compound or laminate stain
- Cloth or sponge for cleaning
- Protective gloves, eye protection, and dust mask
- Small brush for applying colour compound
Materials you'll need:
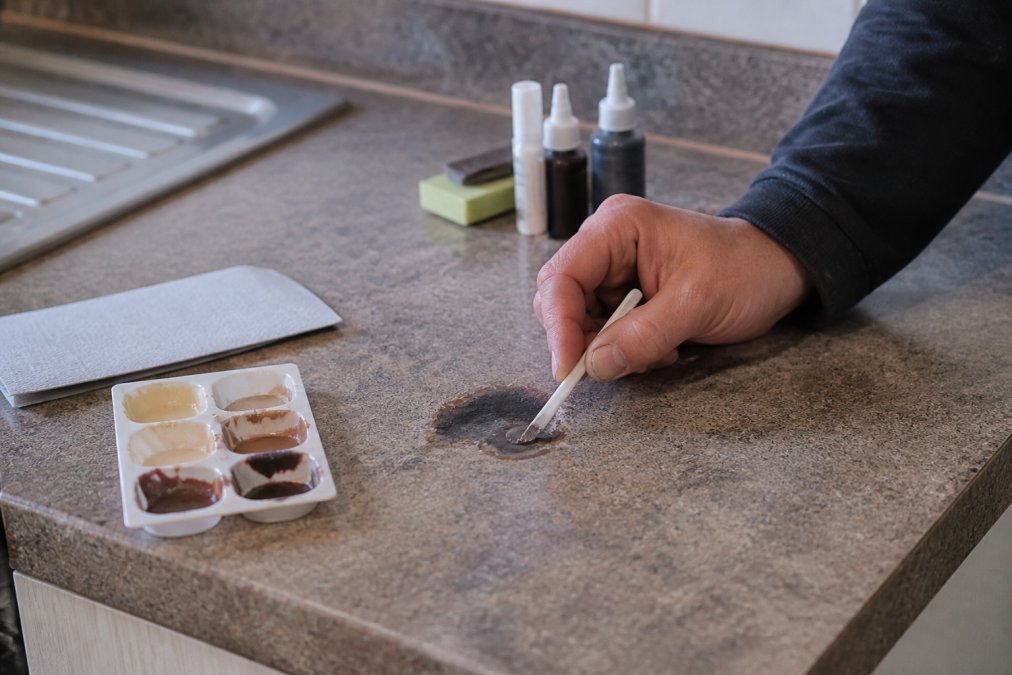
- Laminate worktop repair kit (available from DIY retailers and specialist suppliers)
- Fine steel wool or abrasive pad
- Clear finish sealer or lacquer (optional, for added protection)
- White spirit or appropriate solvent for your filler type
A complete laminate repair kit typically includes filler compound, colour-matching stains, and application tools designed specifically for laminate.
Safety Considerations
Wear a dust mask or respirator when sanding (guidance on respirators in construction). Laminate dust particles are fine and can irritate lungs. For extended work, a half-mask respirator rated for dust is more effective than a simple dust mask.
Use eye protection when sanding or scraping. Safety glasses or a full face shield provide adequate protection.
Ensure adequate ventilation in your kitchen. Open windows and run extractor fans if available. Some laminate fillers and sealers release fumes as they cure.
Wear gloves when handling repair compounds. Most epoxy and polyester fillers can irritate skin with prolonged contact. Nitrile gloves offer good protection and allow reasonable dexterity for detailed work.
Using a Laminate Worktop Repair Kit
Assessing the Damage
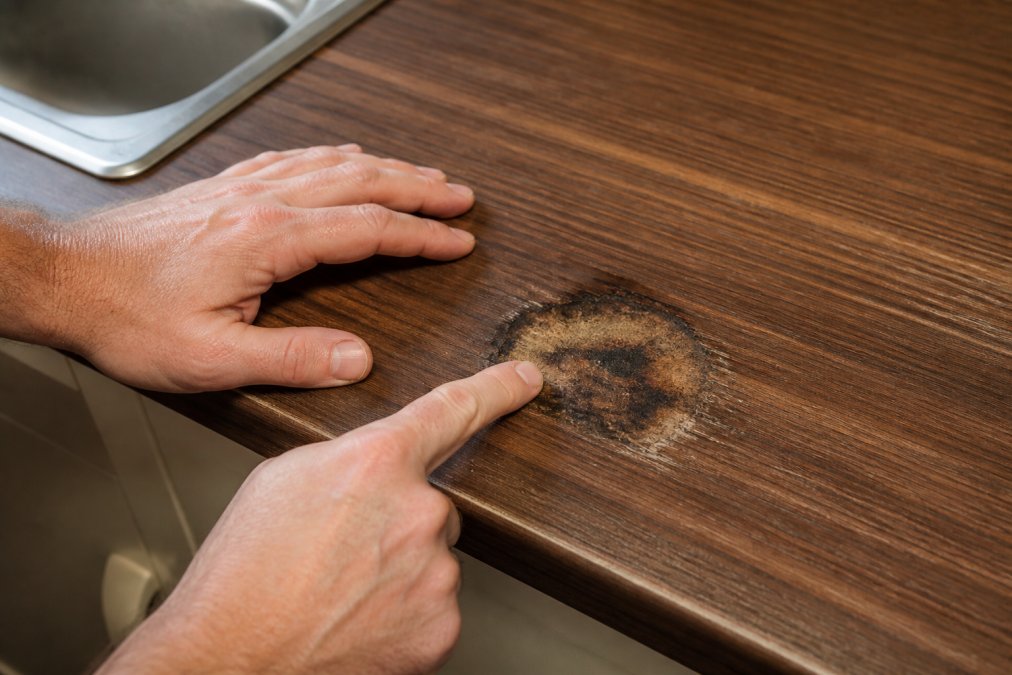
Before opening your repair kit, assess the burn mark carefully. This determines whether DIY repair is realistic or whether professional help is needed.
Run your fingernail across the damaged area. If the burn is shallow, confined to the decorative surface layer, repair is straightforward. If the burn is deep, penetrating through the decorative layer into the substrate, repair is more challenging but still possible. If the burn extends through multiple layers or has caused swelling or delamination at the edges, the damage may be beyond practical DIY repair.
Examine the colour and pattern around the burn. Solid-colour worktops are easier to repair because colour-matching is simpler. Patterned or speckled finishes require more careful colour-matching work.
Preparing the Surface
Proper surface preparation determines whether your repair bonds well and looks professional.
Clean the burn mark thoroughly with a damp cloth to remove dust, debris, and any loose material. Allow to dry completely. Use coarse sandpaper (80-120 grit) to remove the burnt surface layer in gentle circular motions. The goal is to remove the charred layer and create a slightly roughened surface for the filler to grip.
Wipe away all dust with a damp cloth and allow to dry. If the burn has sharp or ragged edges, use fine sandpaper (220 grit) to smooth them slightly.
Applying the Filler
Apply the laminate repair filler according to the kit's instructions. Most epoxy or polyester fillers require mixing or are supplied ready-to-use.
If mixing is required, combine components in the exact ratio specified. Incorrect mixing ratios compromise curing and bonding. Use a filling knife to press the filler into the burn mark, overfilling slightly as the filler will shrink as it cures. Press firmly to ensure the filler contacts all surfaces and expels air pockets.
Smooth the surface with the filling knife, working from the edges toward the centre. Feather the edges so the filler blends smoothly with the surrounding laminate. Allow the filler to cure according to the kit's instructions, typically 2-4 hours for most products.
Sanding and Finishing
Once cured, sand the filled area smooth using fine-grit sandpaper (220-400 grit) in gentle circular motions until the filler is level with the surrounding worktop surface.
Wipe away all dust with a damp cloth and allow to dry completely.
Apply colour-matching compound. Most repair kits include stains or tints designed to match common laminate finishes. Test the colour on an inconspicuous area first. Apply the colour compound with a small brush, working carefully within the repaired area. Allow to dry fully. If the match isn't perfect, apply another thin layer. Multiple thin coats blend better than one thick coat.
Once the colour is satisfactory, apply a clear finish sealer if the kit includes one. This protects the repair and helps blend it with the surrounding surface. Allow to cure fully before using the worktop.
How Long Does a Laminate Repair Take?
The time required to repair deep burn marks depends on the burn's depth and size, and whether you're doing DIY repair or hiring a professional.
DIY repair timeline:
For a single deep burn mark, expect the process to take 3-5 hours spread across 1-2 days (research on domestic repair project timelines). This includes surface preparation (30-45 minutes), filler application (15-30 minutes), curing time (2-4 hours), sanding and finishing (60-90 minutes), and colour-matching (30-60 minutes). Most of this time is curing time. Active hands-on time is typically 2-3 hours.
Professional repair timeline:
A professional assessment and repair typically takes 2-4 hours on-site, depending on the burn's complexity. Surface Magic Repairs can usually complete a single deep burn repair during a single visit, minimising disruption.
The advantage of professional repair is speed and quality. Professionals have access to industrial-grade products, colour-matching equipment, and experience that produces superior results. For worktops in busy kitchens or commercial environments, professional repair minimises disruption and ensures durability standards are met.
Cost of Professional Worktop Repair vs DIY
The cost comparison between DIY repair and professional repair depends on the burn's severity, your time, and the quality outcome you need.
DIY repair costs:
A laminate worktop repair kit costs between £15 and £40. Most kits include filler, colour-matching compounds, and basic tools. If you need sandpaper, gloves, or other consumables you don't already have, add £10-20.
Total DIY material cost: £25-60 for a single repair.
The hidden cost is your time and the risk of a poor result. If the colour match isn't perfect or the repair fails, you've invested hours with disappointing results.
Professional repair costs:
Professional repair costs depend on the burn's complexity and your location. Surface Magic Repairs provides instant quotes for specific damage. For a single deep burn on a standard laminate worktop, professional repair typically costs significantly less than removing and replacing the worktop section.
The real comparison:
If the repair succeeds, DIY saves money upfront but costs your time. If it fails, you've wasted materials and time, then paid for professional repair anyway, making the total cost higher than professional repair from the start.
Professional repair guarantees the result, avoids your time investment, and typically costs less than a failed DIY attempt followed by professional repair.
When to Call a Professional
Some burn marks are beyond practical DIY repair.
Call a professional if the burn mark is very deep, penetrating through multiple layers or causing swelling and delamination at the edges. Call a professional if the burn is part of wider damage affecting multiple areas, or if your worktop has a complex pattern or distinctive finish that's difficult to match.
Call a professional if the burn is in a high-visibility location where guests or customers see it and you need the repair to be nearly invisible. Professional repairs consistently achieve better colour matching and blending than DIY work.
Call a professional if you're repairing a rental property, commercial kitchen, or hospitality environment. Downtime is expensive. Professional repair is faster, guarantees the result, and avoids the risk of a poor repair that affects your business or tenant satisfaction.
Common Mistakes to Avoid
Understanding common repair mistakes helps you achieve a better result.
Using the wrong filler: Wood filler, caulk, or generic fillers don't bond properly to laminate and shrink as they cure. Always use laminate-specific epoxy or polyester filler.
Skipping surface preparation: Rushing to apply filler without properly cleaning and sanding the burn mark means the filler won't bond well. Dust and debris trapped under the filler weaken the repair and cause premature failure.
Underfilling the burn: Applying too little filler means the repair sits below the surrounding surface level. Overfill slightly, the filler shrinks as it cures, and you can sand it level.
Sanding too aggressively: Oversanding the repair creates a depression or exposes the filler at the edges. Use fine-grit sandpaper and sand gently.
Rushing the colour match: Applying colour compound before the filler is fully cured traps moisture and weakens the bond. Wait for complete curing. Test colour matches on hidden areas first. Multiple thin coats blend better than one thick coat.
Ignoring the surrounding pattern: On patterned worktops, the repair will be visible if the colour doesn't match exactly. If your worktop has a distinctive pattern, professional colour-matching is worth the cost.
Applying sealer too early: If the filler and colour aren't fully cured, sealer traps moisture and causes the repair to fail. Allow full curing before sealing, typically 24 hours after the final colour coat.
Not protecting the repair during curing: Dust, moisture, and accidental contact during curing compromise the repair. Keep the area clear and undisturbed until everything is fully cured.
Preventing Future Burn Marks
Once you've repaired deep burn marks on your laminate worktop, preventing new damage is straightforward.
Use trivets or heat-resistant mats under hot pans, pots, and cooking equipment. Laminate can withstand brief contact with heat up to about 60°C, but sustained heat from cookware causes burns. Always check the temperature rating stated on the packaging for specific products. A trivet or mat creates an air gap that prevents direct heat transfer.
Never place hot pans directly on the laminate surface. This is the single most common cause of burn marks. Wipe spills immediately. Moisture that sits on laminate can seep into joints and damage the substrate.
Avoid placing very hot liquids directly on the worktop. Pour hot water into a container first, then place the container on the worktop.
For rental properties and commercial kitchens, staff training is essential. Make sure everyone using the kitchen understands that laminate requires care. Providing trivets, heat mats, and clear guidelines prevents most accidental damage.
Deep burn marks on laminate worktops are frustrating, but they're rarely a reason to replace the entire surface. Most burns can be repaired successfully using specialist filler and finishing techniques. The question isn't whether repair is possible, but whether DIY repair makes sense for your specific situation or whether professional repair offers better value.
For isolated deep burns on solid-colour worktops where you have time to work carefully, a laminate repair kit delivers good results at minimal cost. For complex patterns, multiple burns, or time-sensitive environments, professional repair from Surface Magic Repairs guarantees the result and avoids disruption. Get an instant quote to compare the cost of professional repair against replacement.
Frequently Asked Questions
Can deep burn marks on laminate worktops be repaired?
Yes, many deep burn marks can be repaired effectively using specialist filler and finishing techniques. The success depends on the burn's depth, size, and how much of the laminate surface has been damaged. Surface burns affecting only the top layer respond well to repair kits. However, burns that penetrate through the laminate into the substrate or affect the worktop's structural integrity may require professional assessment or replacement.
What is the best filler for laminate worktop burns?
Two-part epoxy fillers and colour-matched repair compounds work best for laminate burn marks. Choose a filler designed specifically for laminate surfaces, as general-purpose fillers may not bond properly or match the finish. Look for kits that include colour-matching options and finishing tools. Always follow the manufacturer's instructions regarding mixing ratios, application temperature, and curing time for the best results.
How long does a laminate repair take?
A basic laminate worktop repair typically takes between 2 to 4 hours from start to finish, including surface preparation, filler application, sanding, and finishing. Curing time varies by product but often requires 24 hours before the area can be used normally. Complex or extensive burns may take longer. Professional repairs usually complete faster due to experience and specialist equipment, though the worktop may still need a curing period before full use.
Is it cheaper to repair or replace a laminate worktop?
Repairing a burn mark is significantly cheaper than replacing an entire worktop. A DIY repair kit costs considerably less than the material and labour for full replacement. Even professional repair services cost a fraction of removal, installation, and any associated decoration work. Repair is most cost-effective for isolated damage; however, if the worktop has multiple extensive burns or structural damage, replacement may eventually prove more practical.
This article was written using GrandRanker