Last Updated: 1 November 2026
Quick Summary
The best tools for hardwood floor dents are a clothes iron with a damp cloth for raising compressed fibres, plus a colour-matched hard wax stick or wood filler for damage that will not lift. Match the tool to the finish and species, and test discreetly first.
- A smooth dip with intact grain is a dent; a rough crater with torn edges is missing wood.
- Press a moderate iron over a damp cloth for three to five seconds, then check and repeat.
- Stop after two or three short sessions if the dent shows no lift.
- Match filler colour to the surrounding board, not to a shop swatch.
- Keep moisture away from board edges and joints to avoid permanent swelling.
Table of Contents
- What Actually Repairs a Hardwood Floor Dent?
- How to Fix a Small Dent in a Hardwood Floor
- How to Use an Iron to Fix Dents in Wood
- Wood Filler for Floor Dents: When It Works and When It Fails
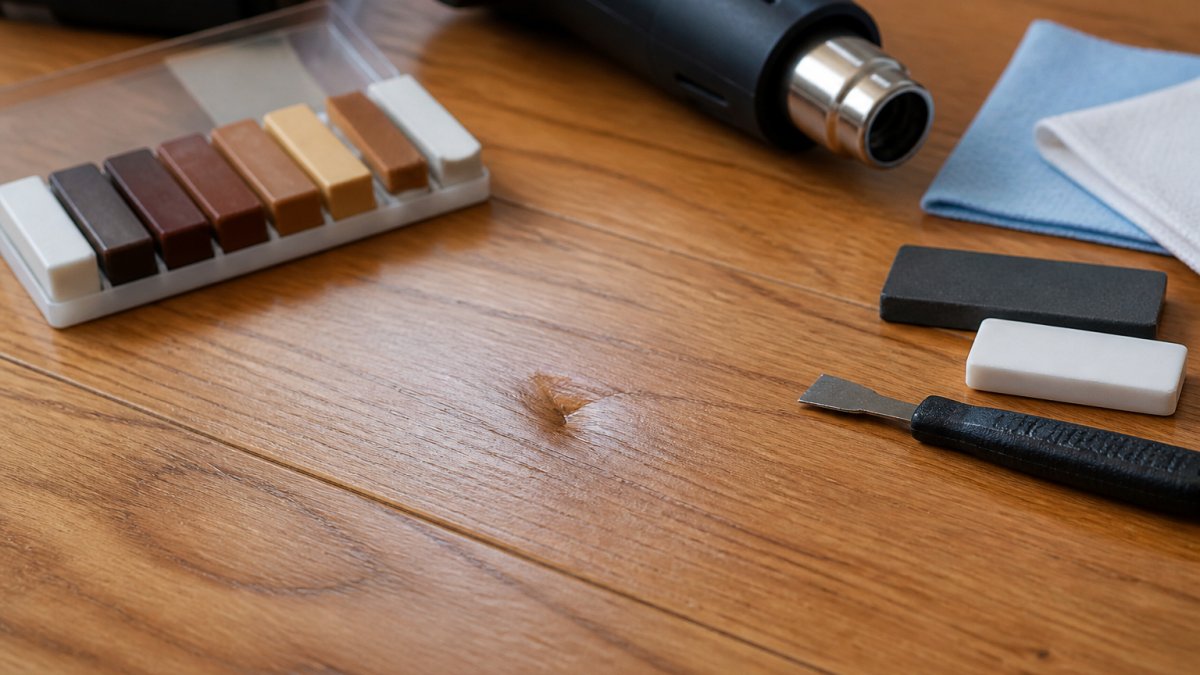
- What Belongs in a Hardwood Floor Repair Kit
- Matching Tools to Your Wood Species and Floor Finish
- How to Tell Whether a Dent Is Too Deep to Fix
- Safety, Prevention and Knowing When to Stop
- Send Photographs Before You Buy Another Repair Kit
- Frequently Asked Questions
What Actually Repairs a Hardwood Floor Dent?
A hardwood floor dent is a compression injury, not a hole. The wood fibres have been crushed downward by impact, and the surrounding finish has usually stretched or cracked over the top. The distinction matters more than any product choice: if the fibres are still there, they can often be raised; if the wood is gone, you are filling, not repairing.
That single fact decides which of the best tools for repairing hardwood floor dents will actually work on your floor.
Compressed Fibres Versus Missing Wood
Run your fingertip across the damage. A smooth dip with intact grain is a dent. A rough crater with torn edges, or a spot where you can see a different colour underneath, is missing wood.
Compressed fibres respond to moisture and heat. Missing wood never does. It needs a filler matched to the surrounding colour, then a finish over the top.
Get this wrong and you will spend money on the wrong kit. Disappointed buyers often buy a wax stick for a gouge, or an iron for a hole.
How to Fix a Small Dent in a Hardwood Floor
Small dents, the kind left by a dropped tool or a chair leg, are the most forgiving. The fix is a short sequence, and patience matters more than equipment.
- Clean the area and check the finish is intact.
- Try moisture first: a damp cloth and a warm iron to swell the fibres.
- If the dent lifts most of the way, let it dry fully, then blend with a touch-up marker or a little hard wax.
- If it stays low, fill with a colour-matched hard wax stick and scrape level.
- Buff and apply a matching finish.
A common mistake is skipping straight to filler. Filler sits on top of crushed fibres rather than restoring them, and on a lacquered floor it can show within weeks.
How to Use an Iron to Fix Dents in Wood
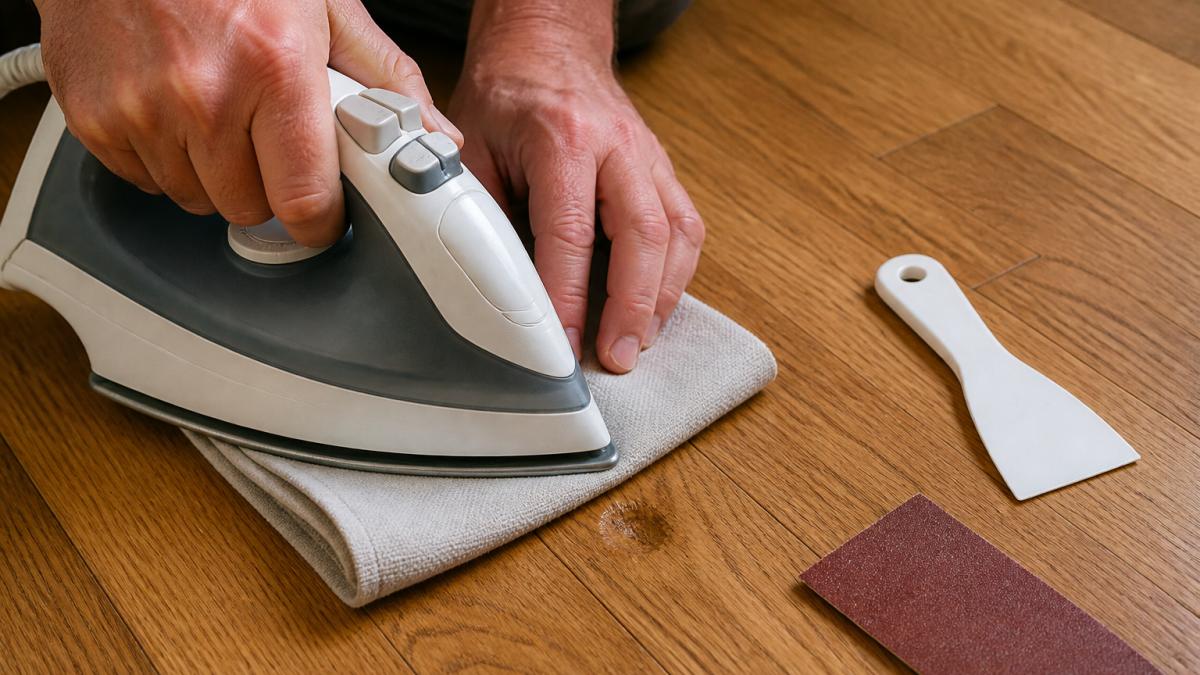
The iron-and-damp-cloth method is the standard first attempt for compressed dents, and it costs nothing beyond what is already in most homes. It works because moisture plus heat relaxes the crushed fibres and lets them swell back toward the surface. The detail that decides success or failure is how you control heat, moisture and time on your particular finish.
The Method, Step by Step
- Clean the dent and check the finish is intact. If the lacquer or oil has cracked open, stop here, moisture will get under the finish and cloud or lift it.
- Dampen a folded cotton cloth so it is damp, not dripping. Wring it out properly; standing water is the enemy of board edges and joints.
- Set the iron to a moderate heat with steam off. A moderate setting is usually enough; you are warming the fibres, not pressing a shirt.
- Lay the cloth over the dent and press the iron down for three to five seconds. Lift, check, and repeat in short bursts rather than holding the iron down.
- Stop as soon as the surface levels out or stops improving. Overheating can cloud a lacquer finish, lift a veneer or drive moisture into the joint.
- Let the area dry fully, ideally overnight, before blending with a touch-up marker or a little hard wax.
Temperature, Timing and the Finishes That Refuse
Fresh dents in solid, unfinished or oiled hardwood often lift well, while old dents and sealed floors respond less readily. The finish is the deciding factor:
- Oiled and waxed floors take the method well, but a hot iron can strip the finish around the repair. Re-oil the area afterwards.
- Lacquered and varnished floors are the risky ones. Heat can cloud, craze or lift the coating, and moisture trapped under a sealed finish has nowhere to go. Test on an inconspicuous board first, and keep sessions very brief.
- Engineered and veneered floors need the most caution. Veneer delaminates when it takes on too much moisture, and the top layer is thin enough that over-wetting shows as a ripple. Keep sessions to a few seconds and never let water pool.
- Waxed finishes will not hold a touch-up marker without preparation, so plan to re-wax rather than rely on a pen.
When the Iron Does Not Work
If two or three short sessions produce no lift, the fibres are either too old, too crushed or already broken. More heat and more moisture stop helping at that point and start damaging the finish. Switch to a colour-matched hard wax or filler rather than persisting, the most common mistake we are asked to put right is a clouded lacquer caused by one session too many.
If the floor is veneered, heavily sealed or you are unsure of the finish, a professional assessment is cheaper than a failed attempt. Surface Magic Repairs can repair dents and impact damage in place, colour matched to the surrounding surface, and will advise honestly if the damage is beyond a simple fix.
Wood Filler for Floor Dents: When It Works and When It Fails
Wood filler for floor dents is the right tool for missing wood, torn grain and dents that will not lift. It is the wrong tool for a compressed dip with an intact finish, where it simply sits proud and looks patchy.
Two rules decide success. First, colour match to the surrounding board, not to a swatch in the shop, because oak, cherry and other species darken and shift with age and light. Second, match the filler type to the finish: a rigid two-part filler under a hard lacquer, a flexible one where the floor moves.
Where filler fails: wide shallow dents, dents on a board joint, and any repair on a floor with underfloor heating that moves seasonally. In those cases a hard wax stick blended with a touch-up marker usually holds up better.
What Belongs in a Hardwood Floor Repair Kit
A sensible hardwood floor repair kit for domestic use is smaller than the shelves suggest. You need tools for three jobs: raising fibres, filling, and blending. Most competitors list the same items; what they rarely explain is how to choose between them, which is where most wasted spend happens.
| Tool | What It Does | Best For | Skip If |
|---|---|---|---|
| Clothes iron and damp cloth | Swells compressed fibres | Fresh dents, intact finish | Veneer with lifting edges |
| Hard wax or shellac stick | Fills small dents and gouges | Small dents, spot repairs | Deep holes, damp floors |
| Colour-matched wood filler | Rebuilds missing wood | Torn grain, gouges | Shallow compressed dents |
| Touch-up marker or colour putty | Blends colour and grain | Edges, scratches, minor damage | Large areas |
| Plastic scraper or spatula | Levels filler and wax | Every fill | Never |
| Fine abrasive paper | Flattens and keys the repair | Before refinishing | Waxed floors needing no sanding |
| Painter's tape | Contains the repair area | Edges and joints | Never |
Add a good light and a clean cloth. Most failed DIY repairs we are asked to put right come down to poor colour matching and impatience, not missing tools.
Choosing Between the Products
A kit is only as good as the products inside it, and the differences matter more than the packaging suggests.
Wax hardness. Hard wax sticks come in different hardness grades. A soft wax is easy to work into a shallow dent but picks up dirt and wears quickly in a hallway. A hard wax holds up better under foot traffic but is harder to blend on a delicate repair. For a floor you walk on daily, lean towards the harder grade and blend it carefully rather than reaching for the softest stick.
Filler type. Rigid two-part fillers suit a hard lacquer where the floor does not move much. Flexible fillers suit floors that move seasonally, such as those over underfloor heating. Match the filler to the finish and the movement, not to the colour alone.
Colour matching. Match to the surrounding board, not to a swatch in the shop, because oak, cherry and other species darken and shift with age and light. A repair blended rather than painted over will look right for longer.
Included accessories. A kit that includes a scraper, abrasive paper and a colour-blending tool saves you buying them separately, but check the wax or filler is the right grade for your finish before you buy the box.
Occasional versus repeated repairs. A single-dent household needs a small kit and a wax stick. A landlord, letting agent or facilities team repairing the same damage across multiple properties is better served by a refillable kit with a range of wax colours and a proper scraper, because the per-repair cost falls sharply with repeated use.
Testing Before You Commit
Before using any product on a visible board, test it discreetly, under a piece of furniture, inside a cupboard or on an offcut. Check the colour match in daylight, not under a warm bulb, and check the finish dries to the same sheen as the surrounding floor. A product that looks right wet can dry noticeably lighter or darker.
If you are unsure which grade or colour suits your floor, send clear photographs of the damage and the surrounding boards to Surface Magic Repairs. A professional assessment can save the cost of several failed kits, and the team will advise honestly if a repair is suitable or if replacement would be more durable.
Matching Tools to Your Wood Species and Floor Finish
Oak, cherry and other hardwoods behave differently under the same tool. Oak takes filler well. Cherry darkens with age, so a colour match made today can look wrong in a year unless the repair is blended rather than painted over. Softer species dent more easily and lift more readily with moisture.
Finish matters just as much. A lacquered floor hides wax poorly; an oiled floor takes wax beautifully. On a waxed finish, a touch-up marker will not bond without preparation.
Identify the species and finish before buying anything. If you cannot, a professional assessment may prove cheaper than several failed kits.
How to Tell Whether a Dent Is Too Deep to Fix
Depth alone is not the test. The real questions are whether the fibres survive, whether the finish is broken, and whether the board is structurally sound.
Signs a dent is beyond a simple repair:
- You can see bare wood or a different colour at the base.
- The board flexes or creaks underfoot.
- Water has got in and the wood is stained or swelling.
- The dent sits across a joint or the edge of a board.
- The finish has cracked and lifted around the damage.
A deep, clean dent in solid oak can often be improved considerably. A shallow dent in a delaminating veneer cannot. If you are unsure which side of the line you are on, our guide to the signs you need a flooring specialist for repairs sets out what to look for before you spend anything.
Safety, Prevention and Knowing When to Stop
The most common mistake is persistence. Once a dent has lifted as far as it will go, more heat and more moisture stop helping and start damaging the finish.
Safety points worth taking seriously:
- Never leave a hot iron unattended on a floor.
- Keep moisture away from board edges and joints, where swelling causes permanent damage.
- Ventilate the room when using solvent-based fillers and finishes (Construction hazardous substances: Solvents).
- Wear eye protection when scraping or sanding overhead.
Prevention is simpler than repair. Felt pads under furniture legs, a doormat at every entrance, and prompt mopping of spills remove most causes of hardwood floor dents. If you have decided to pause before repairing, our advice on how to stop surface damage getting worse before a repair covers the cautious steps in the meantime.
Send Photographs Before You Buy Another Repair Kit
For a single fresh dent in an oak board, a cloth, an iron and a wax stick may do a reasonable job. For anything deeper, wider, veneered, or on a floor you care about, a professional repair may be a better option than replacing boards.
Surface Magic Repairs is Bolton-based and travels across Greater Manchester and the wider North West, with nationwide work for commercial projects. Repairs to dents, scratches and impact damage are completed in place, colour matched to the surrounding surface, so there is no strip-out and no knock-on decorating.
Before you buy another kit, compare the options properly with our guide to DIY versus professional repair for new build surfaces, or check whether we cover your area on our surface repair coverage across Bolton, Manchester and the North West.
Send clear photographs of the damage, the complete item and the surrounding area, together with your full address and postcode. Surface Magic Repairs can assess whether a repair is suitable and provide a quotation. Call 0800 085 7773 or email info@surfacemagicrepairs.com during office hours, Monday to Friday, 9:00am to 3:00pm.
Frequently Asked Questions
Is wood filler suitable for hardwood floor dents?
It depends on the dent. Wood filler for floor dents works best where fibres are torn or missing rather than compressed, because filler sits in a void rather than lifting the wood back up. On a shallow compression dent in solid oak, steaming is usually the better first attempt. On a deep gouge that has removed material, a colour-matched filler followed by a finish coat is the practical route. Filler can shrink or stand out under wear, so match the shade carefully and avoid over-sanding the surrounding finish.
Can an iron remove dents from a hardwood floor?
An iron can raise shallow dents in solid wood because steam swells compressed fibres back towards the surface. It will not work where the fibres are cut or missing, and it will not work on engineered boards where the wear layer is thin, because moisture and heat can lift or cloud the finish. Use a damp cloth between iron and floor, keep the iron moving, and stop if the finish starts to look dull or white. Test on a hidden area first.
Do hardwood floor repair kits work on dents?
A hardwood floor repair kit is only as good as the match between its contents and the damage. Kits built around wax sticks and touch-up markers suit small surface dents and scratches on finished floors, where you are colouring and sealing rather than rebuilding. Kits containing filler and a scraper suit deeper gouges. No kit raises compressed fibres, so if the dent is a depression rather than a hole, steaming comes first and the kit comes second.
When should a dented hardwood floor be repaired by a professional?
Call in a professional when the dent is deep enough to have broken the finish, when the board is lifting or creaking, when the damage covers several boards, or when your attempts at steaming have left a dull patch. Surface Magic Repairs assesses damage from photographs before booking, so you get an honest view on whether repair or replacement is the sensible option. Send clear images of the dent, the full board and the surrounding area, plus your address and postcode, to info@surfacemagiccan repair.com or call 0800 085 7773.
A dented floor rarely needs replacing, but it does need an honest assessment of whether the fibres will lift or the wood is gone. Surface Magic Repairs repairs dents, scratches and impact damage in place, with colour and finish matched to the existing surface, no strip-out, and far less disruption than replacement. Get started with Surface Magic Repairs and send your photographs today for a straightforward answer on whether a repair is the right call.