Last Updated: October 29, 2026
Quick Summary
Most scratches on engineered wood flooring can be fixed, but the method depends on how deep the scratch goes. Surface marks in the finish are usually a DIY fix with a wax or resin stick, while deep scratches need filling and colour matching rather than sanding. The thin wear layer limits how much sanding the board can take.
- Run a fingernail across the scratch to judge whether it sits in the finish, the veneer or the core.
- Work along the grain with light pressure when repairing light scratches in the wear layer.
- Deep scratches should be cleaned, filled, levelled, tinted and then sealed with a matching finish.
- Excessive sanding can cut through the wear layer and cause permanent damage that cannot be fixed.
- Match the sheen as well as the colour, as a glossy repair shows up on a matt floor.
Table of Contents
- What You Need to Know Before You Start
- What You'll Need for the Job
- Step 1: Assess the Depth of the Scratch
- Step 2: Repair Light Scratches in the Wear Layer
- How to Repair Deep Scratches in Engineered Wood Flooring
- Can Engineered Wood Flooring Be Sanded and Refinished?
- Choosing the Best Scratch Repair Kit for Engineered Wood Flooring
- How to Prevent Scratches on Engineered Wood Floors
- When to Call a Professional for Scratched Flooring
- Send Photos for an Honest Repair Assessment
- Frequently Asked Questions
What You Need to Know Before You Start
Most scratches on engineered wood flooring can be fixed, but the method depends entirely on one thing: how deep the scratch goes. The wear layer on top is thin, often just a few millimetres, and that limit decides whether you can sand it out or need a different approach.
This guide covers practical options for dealing with scratches on engineered wood flooring.
Here is the direct answer. Whether a scratch can be repaired depends on the material, condition and extent of the damage. A professional assessment can help determine whether repair is suitable or replacement is more appropriate.
The key is knowing which one you are dealing with before you touch it.
Engineered wood flooring is a layered board made from a real wood veneer bonded to a plywood or fibreboard core, and that construction is what limits how much sanding it can take.
Installation guidance for engineered boards recommends checking for and touching up nicks and scratches straight after fitting, while the damage is still fresh (Shaw Contract Group installation guidance). Catch it early and a repair is simple. Leave it and dirt works into the gap.
- Wear layer thickness decides your options
- Surface scratches are usually a DIY fix
- Deep scratches need filling, not sanding
- Board damage may mean replacement
What You'll Need for the Job
You do not need a full workshop to handle light scratches. A small set of supplies covers most jobs, and you probably have some of it already.
Gather these before you start:
- A soft cloth and a mild wood-safe cleaner
- A bright work light or torch
- A wax or resin scratch repair stick in a matching shade
- Fine abrasive pads, around 0000 grade
- A colour-matched floor finish or lacquer
- A plastic scraper and masking tape
- A vacuum with a soft brush head
Skip the harsh household cleaners. Bleach and multi-surface sprays can strip the finish and leave a dull patch that is harder to fix than the scratch itself.
If your board has a textured or hand-scraped finish, buy a repair product made for textured surfaces. A smooth wax stick will sit proud of the grain and catch the light.
Step 1: Assess the Depth of the Scratch
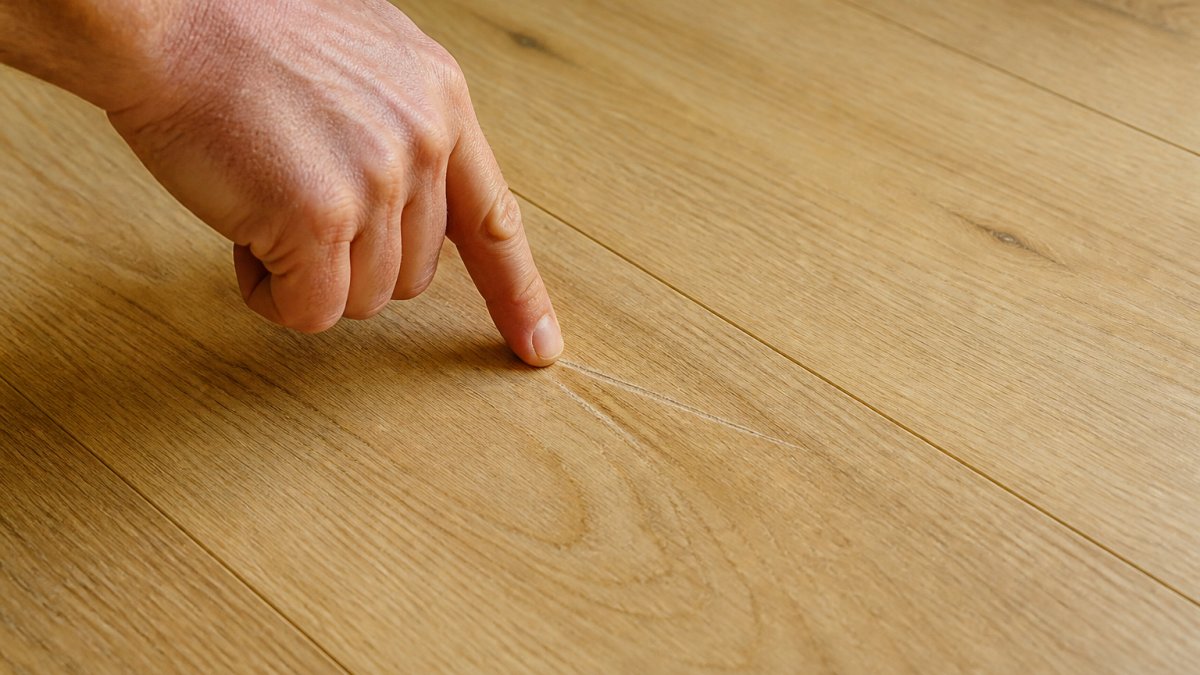
Depth is everything. Run a fingernail gently across the scratch. If your nail does not catch, it is a surface mark in the finish. If it catches slightly, you are into the veneer. If it catches hard and you can see a lighter colour underneath, you may be through to the core.
Here is a quick way to sort them:
| What you see | What it means | Likely fix |
|---|---|---|
| Faint scuff, no nail catch | Surface mark in finish | Polish or wax stick |
| Nail catches lightly | Scratch in the veneer | Fine sand and refinish |
| Pale line, deep catch | Through the veneer | Fill and colour match |
| Lifted or splintered edge | Board damage | Professional assessment |
Step 2: Repair Light Scratches in the Wear Layer
Light scratches are the easy ones. Work along the grain, never across it, and keep your pressure light.
Follow these steps:
- Clean the area and let it dry fully.
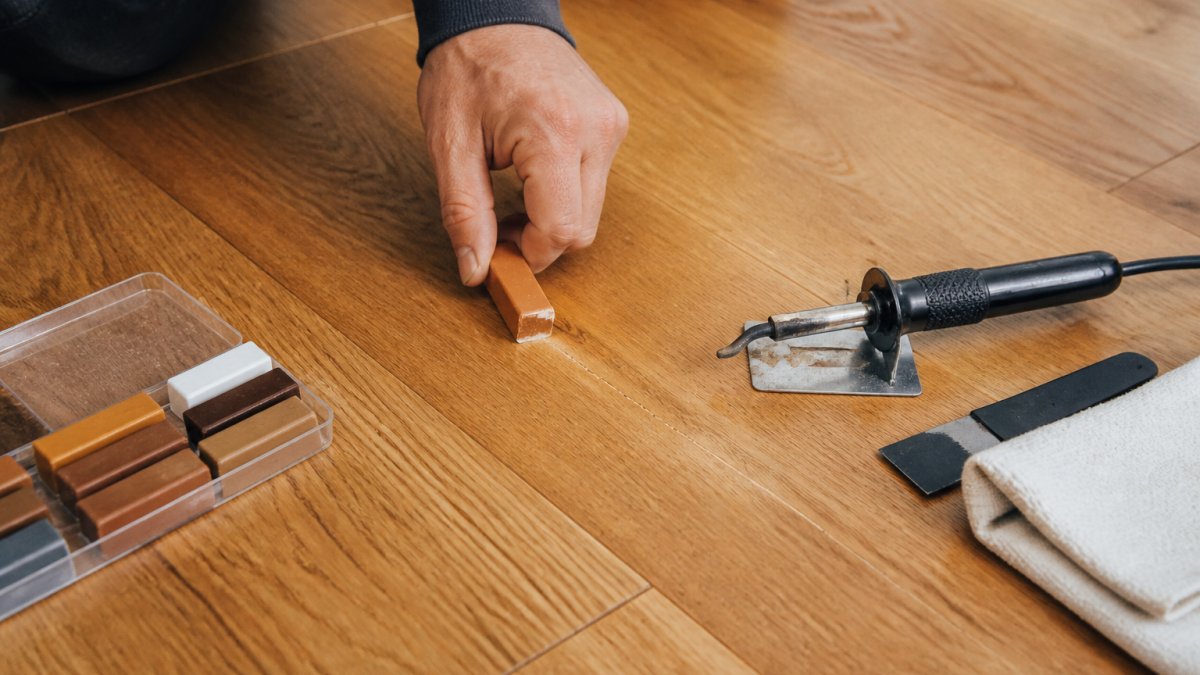
- Rub a wax or resin repair stick into the scratch, following the grain.
- Wipe away the excess with a soft cloth before it sets.
- Buff the area with a fine pad to blend the edges.
- Apply a thin coat of matching finish if the sheen looks dull.
For very fine scuffs, a light rub with a 0000 pad followed by a matching polish often does the job. Test on a hidden area first, such as under a piece of furniture, to check the colour match.
Watch out: over-rubbing a small scratch can wear through the finish around it, leaving a bigger dull patch than the mark you started with. Go gently and check as you go.
How to Repair Deep Scratches in Engineered Wood Flooring
Deep scratches need a different approach. You cannot sand these out without risking the veneer, so the fix is to fill and disguise them.
The process works like this:
- Clean out any loose fibres from the scratch
- Apply a wood filler matched to the floor colour
- Level the filler flush with the surface
- Reproduce the grain colour with a touch-up pen or tint
- Seal with a matching finish
For deeper damage on a favourite board, a professional assessment can help determine whether a repair is suitable or replacement is more appropriate.
Can Engineered Wood Flooring Be Sanded and Refinished?
Sometimes, but far less often than people assume. The veneer on engineered boards is thin, and sanding removes material you cannot put back.
According to Wooden Floors UK guidance on engineered boards, excessive or improper sanding can cut through the wear layer and cause permanent damage that no further sanding can fix. That is the risk most DIY guides gloss over.
A full sand and refinish is only realistic when:
- The wear layer is thick enough to take it
- The scratches are shallow and widespread
- A flooring specialist has confirmed the board can handle it
For isolated scratches, spot repair is almost always the better choice. It saves the veneer and avoids the mess of a full sand. If you are weighing up the two routes, our guide on DIY vs professional repair for new build surfaces sets out where each one makes sense.
Choosing the Best Scratch Repair Kit for Engineered Wood Flooring
The best scratch repair kit for engineered wood flooring is one that matches your floor's colour and finish, not the cheapest box on the shelf. A mismatched kit creates a visible patch.
Look for these features:
- Colour options that match your board, not just "light" or "dark"
- A wax or resin stick for surface marks
- A filler for deeper scratches
- A finish or lacquer to seal the repair
- Clear instructions for your floor type
Avoid kits sold for solid hardwood only. The products are often too aggressive for a thin veneer.
What most guides miss is that sheen matters as much as colour. A matt floor with a glossy repair will show up in raking light even if the colour is perfect. Check whether your floor is matte, satin or gloss and buy accordingly.
How to Prevent Scratches on Engineered Wood Floors
For rental properties, a quick check between tenancies catches small scratches before they become a deposit dispute. Landlords managing several properties often find a planned repair visit cheaper than replacing boards one at a time.
When to Call a Professional for Scratched Flooring
Surface Magic Repairs will assess the floor honestly before any work is booked. You can also see the scratch, dent and chip repairs service for localised damage across suitable hard surfaces. If replacement is the more durable option, we will say so. Our article on the signs you need a flooring specialist goes deeper if you are unsure.
Send Photos for an Honest Repair Assessment
Send clear photographs of the damage, the complete item and the surrounding area, together with your full address and postcode. Surface Magic Repairs can assess whether a repair is suitable and provide a quotation. Surface Magic Repairs is Bolton-based and covers Greater Manchester and the wider North West, with nationwide work for commercial and multi-site projects. You can see the full range of specialist surface repair services we offer before you get in touch.
Call 0800 085 7773 or email info@surfacemagicrepairs.com during office hours, Monday to Friday, 9:00am to 3:00pm.
Frequently Asked Questions
Can scratches be repaired on engineered wood flooring?
Whether a scratch can be repaired depends on the material, condition and extent of the damage. A professional assessment can help determine whether repair is suitable or replacement is more appropriate.
Can you sand and refinish engineered wood flooring?
Whether engineered wood flooring can be sanded and refinished depends on the material and its condition. Seek a professional assessment before deciding whether repair or replacement is appropriate.
Will a wood repair marker hide scratches on engineered flooring?
Whether a scratch can be repaired depends on the material, condition and extent of the damage. A professional assessment can help determine whether repair is suitable or replacement is more appropriate.
When should scratched engineered wood flooring be replaced rather than repaired?
Whether repair or replacement is appropriate depends on the material, condition and extent of the damage. Surface Magic Repairs will advise honestly if replacement would be more appropriate or durable.
A scratched floor is not automatically a replacement job. Most engineered boards can be repaired in place, colour matched and refinished, which saves the cost and disruption of lifting the whole floor. Surface Magic Repairs repairs surfaces in place with colour and finish matching, and we have restored more than 46,000 surfaces in the last year. Get started with Surface Magic Repairs and send your photos for an honest assessment and a quotation.