Table of Contents
- Why Cutting a Worktop for a Sink Matters
- Tools and Materials You'll Need
- Measuring and Marking Your Sink Cutout
- Cutting Techniques for Different Worktop Materials
- Step-by-Step Cutting Process
- How to Seal Worktop Edges After Cutting
- Common Mistakes to Avoid
- What to Do If Something Goes Wrong
- Conclusion
- Frequently Asked Questions
Last Updated: September 29, 2026
Why Cutting a Worktop for a Sink Matters
Fitting a new sink into an existing kitchen worktop is one of those jobs that looks straightforward until you pick up a saw. Get the measurements wrong by a few millimetres and the sink won't fit. Cut in the wrong place and you've damaged a surface that was meant to last another decade. The difference between a neat, professional cutout and a botched one often comes down to preparation and technique.
Whether you're installing a new sink yourself, replacing a damaged one, or preparing a worktop for a professional fitter, understanding how to cut a kitchen worktop for a sink properly saves time, money and frustration. Different materials behave differently when cut. Laminate worktops chip easily. Solid-surface worktops need specific tools to avoid cracking. Stone and quartz demand care and precision.
This guide walks you through the process step by step, covering the tools you'll need, how to measure accurately, cutting techniques for different materials, and what to do if things don't go to plan.
Tools and Materials You'll Need
Cutting a worktop cleanly requires the right equipment. Using the wrong tool often causes more damage than it prevents.
Essential tools:
- Jigsaw with fine-toothed blades (for curves and detailed work)
- Circular saw (for straight cuts, though less suitable for tight curves)
- Drill with spade bits or hole saws (to start internal cuts)
- Tape measure and pencil
- Straightedge or metal ruler
- Clamps to hold the worktop steady
- Sandpaper or file for smoothing edges
- Protective equipment: safety glasses, dust mask, ear protection
Materials you may need:
- Edge banding or trim to seal the cut edge
- Silicone sealant (for moisture protection)
- Masking tape (to prevent chipping on laminate)
The quality of your saw blade matters more than the saw itself. A dull blade or one designed for rough work will tear and splinter the surface. For laminate and solid-surface worktops, use fine-toothed blades designed for finishing cuts, not construction cuts.
Clamps are not optional. A worktop that moves while you're cutting will produce a ragged line and increases the risk of the saw binding or slipping.
Measuring and Marking Your Sink Cutout
Getting the dimensions right
Accurate measurements are the foundation of a successful cut. A small error in measurement becomes obvious once the sink is in place.
Start by checking the sink's exact dimensions. Don't rely on the packaging or product name, different models vary. Measure the width, depth and any corner radii (the curve at the corners). Note whether the sink has a lip that will sit on top of the worktop or whether it drops through underneath.
Place the sink upside down on the worktop and position it where you want it to sit. Allow adequate clearance from the edge of the worktop, typically at least 50mm from the front edge and 100mm from the sides. This prevents the worktop from being weakened by a cut that sits too close to the edge.
Mark the inner edge of the sink's rim with a pencil. This line represents where your saw blade needs to travel. For drop-in sinks, this is straightforward. For undermounted sinks, you'll need to account for the mounting hardware and check the manufacturer's instructions for the exact setback distance.
Marking the outline accurately
Use a pencil, not a pen. Pencil marks are easier to erase if you need to adjust your layout.
Draw the outline of the cutout clearly. For a rectangular sink, use a straightedge. For rounded corners, trace the sink itself or use a flexible curve guide.
Mark the corners with small crosses so you know exactly where the drill needs to start. Double-check your measurements before you pick up any power tools. Measure from at least two fixed points on the worktop (usually the back edge and one side edge) to confirm the cutout is centred and level.
If the sink has curved corners, some people prefer to mark the straight sides first, then use the sink itself as a template for the curves.
Cutting Techniques for Different Worktop Materials
Laminate worktop repair considerations
Laminate is prone to chipping along the cut edge, particularly on the underside. This is one reason why many people prefer to use a professional service for this work.
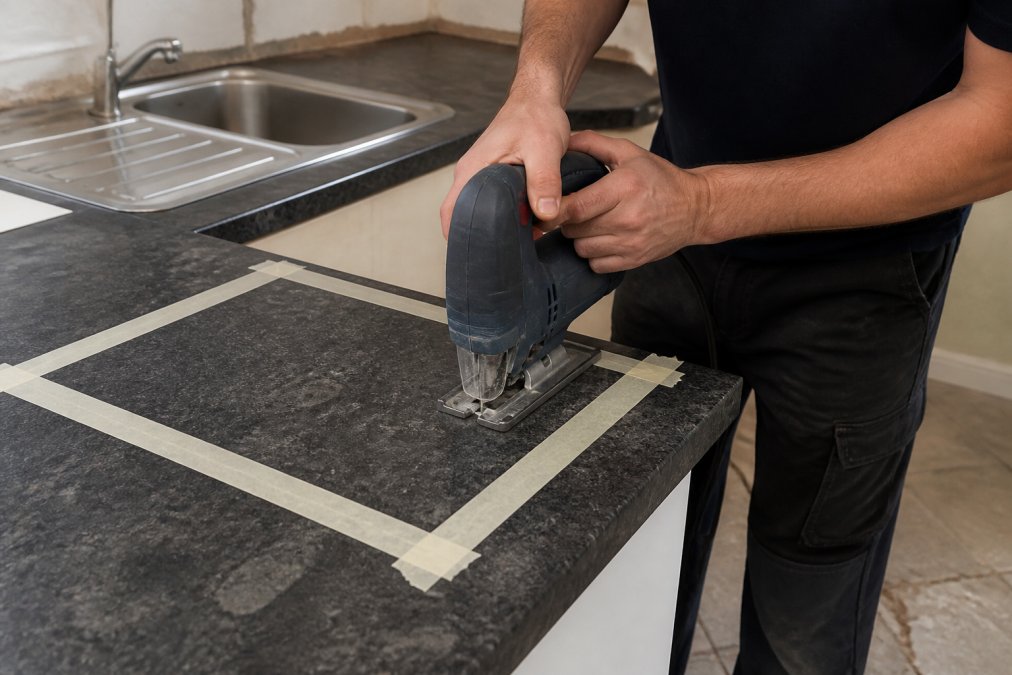
If you're cutting laminate, apply masking tape along both sides of your cut line. This reduces chipping and makes it easier to see where you're cutting. Use a fine-toothed blade and cut slowly. Rushing the cut is the main cause of splintering.
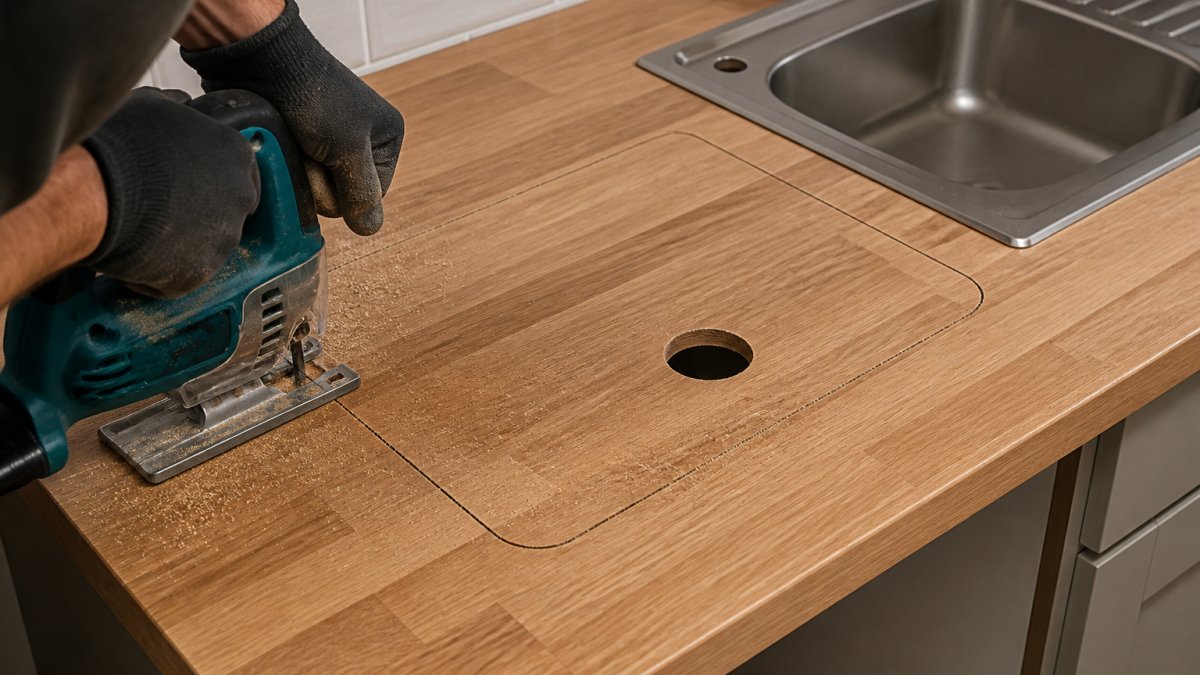
For the initial hole, use a drill with a spade bit or hole saw. Start from the top surface and drill through carefully. Once you have an entry point, you can insert the jigsaw blade and begin the cutout.
Many people find that cutting from the underside of a laminate worktop produces cleaner results on the visible top surface, because the blade exits upward rather than tearing the top layer. If you do this, mark your outline on the underside instead.
After cutting, sand the edge smooth with fine-grit sandpaper. The raw edge of laminate is porous and will absorb moisture. Seal it with edge banding, trim, or silicone sealant to prevent swelling and deterioration.
Solid-surface and stone worktops
Solid-surface materials like Corian are denser than laminate and cut more cleanly, but they generate a lot of dust and heat. Use a dust extraction system or wear a good-quality dust mask. Cut slowly to avoid cracking the material.
Stone and quartz worktops are harder and more brittle. A standard jigsaw may not be suitable. Many professionals use a wet saw or angle grinder with a diamond blade for these materials. If you're not experienced with these tools, this is a job worth passing to a professional. Mistakes on expensive stone are costly.
For any solid-surface material, support the worktop well and avoid cutting near the edge. The further the cut is from the edge, the less risk of cracking.
Step-by-Step Cutting Process
Start by securing the worktop to a sturdy work surface with clamps. The worktop must not move during cutting.
Drill your entry hole at one corner of the cutout using a spade bit or hole saw. Make sure the hole is large enough for the jigsaw blade to fit through. For a standard jigsaw blade, a 10-12mm hole is usually sufficient.
Insert the jigsaw blade into the hole and start cutting along your marked line. Keep the saw moving steadily. Pushing too hard or cutting too fast causes the blade to bind and can produce a ragged edge or even break the blade.
For straight sections, use a straightedge as a guide to keep the blade on line. For curves, follow your marked outline by eye, moving the saw smoothly around the curve.
Once you've completed the cutout, test the fit by placing the sink in the hole. It should sit level and require gentle pressure to drop into place. If it's too tight, use sandpaper to ease the edges. If it's too loose, you may need to recut, which is why careful measurement matters.
Sand all edges smooth, paying particular attention to any rough spots or splinters. Run your hand along the edge to check for burrs.
How to Seal Worktop Edges After Cutting
The cut edge of a worktop is exposed to moisture and will deteriorate if left unsealed.
For laminate worktops, apply edge banding (a thin strip of laminate that matches the worktop surface) along the cut edge. This is glued on and then trimmed flush with the surface. Alternatively, use a flexible silicone sealant to seal the edge and prevent moisture ingress.
For solid-surface worktops, the material can usually be sealed with a thin bead of silicone sealant applied along the edge where the sink meets the worktop.
For stone and quartz, check the manufacturer's guidance. Some recommend sealing with a stone sealer; others suggest silicone sealant is sufficient.
Once the sink is installed, run a bead of silicone sealant around the junction between the sink rim and the worktop. This prevents water from seeping underneath and damaging the worktop structure.
Common Mistakes to Avoid
The most frequent mistake is measuring from only one point. If the worktop isn't perfectly parallel to the wall, a single reference point can lead to an off-centre cutout. Always measure from at least two points.
Cutting too quickly is another common error. A jigsaw blade that's forced through the material will produce a rough edge and may bind or snap. Let the saw do the work and guide it steadily.
Using the wrong blade for the material wastes time and produces poor results. A construction blade designed for rough framing will tear a laminate surface. Use a fine-toothed finishing blade.
Not securing the worktop properly means it moves while you're cutting, making it difficult to follow your line accurately. Clamps are essential.
Failing to seal the cut edge allows moisture to penetrate the material, causing swelling, warping and eventual failure. This is particularly important for laminate, which is vulnerable to water damage.
What to Do If Something Goes Wrong
If the cutout is slightly too small, sand the edges to ease the fit. If it's too large, the sink will be unstable. Depending on how far off you are, you might be able to shim the sink with packing pieces, but this is not a permanent solution.
If you've cut in the wrong place, you have a problem. Laminate and solid-surface worktops can sometimes be patched, but the repair is visible. For stone and quartz, a professional repair may be possible.
If the edge is splintered or rough, sand it smooth. For laminate, this may expose the substrate underneath. Once sanded, apply edge banding or sealant to protect the material.
If the worktop cracks during cutting, stop immediately. For laminate, the crack may be contained to the top layer. For solid-surface or stone, the worktop is likely damaged beyond practical repair.
When a worktop has been cut incorrectly or damaged beyond your ability to fix it, replacement is often the only sensible option. Surface Magic Repairs can assess whether a worktop with a botched cutout is worth repairing or whether replacement would be more practical and durable. Send clear photographs of the damage, together with your address and postcode, and the team can advise whether a repair is suitable.
Conclusion
Cutting a kitchen worktop for a sink is a precise job that rewards careful measurement and the right technique. Different materials behave differently, laminate chips easily, solid-surface materials can crack, and stone demands specialist equipment and skill.
If you're confident with power tools and have the right equipment, it's a job you can do yourself. If you're uncertain, or if the worktop is expensive or difficult to replace, it's worth bringing in a professional.
If something goes wrong, a cut in the wrong place, a damaged edge, or a worktop that's cracked, Surface Magic Repairs can often repair the damage rather than requiring the whole worktop to be replaced. The team specialises in worktop repairs including edge damage, discolouration and cosmetic defects. Send photographs of the damage, your full address and postcode to info@surfacemagicrepairs.com or call 0800 085 7773 (Monday to Friday, 9:00am-3:00pm) for an honest assessment and quotation.
If your worktop has been damaged during installation or you're unsure whether a repair is possible, Surface Magic Repairs can help. The team has repaired more than 46,000 surfaces in the last year and brings together over 25 years of combined trade experience. Rather than replacing an entire worktop, repairs completed in place with colour and finish matching often restore the surface at a fraction of the replacement cost. Contact the team on 0800 085 7773 or visit surfacemagicrepairs.co.uk for a quotation.
Frequently Asked Questions
What tools do I need to cut a kitchen worktop for a sink?
You'll need a jigsaw with a fine-toothed blade, a circular saw for straight edges, a drill with a spade bit to create starter holes, a tape measure, pencil, clamps to secure the worktop, safety glasses, and a dust mask. For laminate worktops, use a fine-toothed blade to minimise chipping. A router can help seal edges afterwards. Always wear appropriate personal protective equipment when cutting.
How do I seal worktop edges after cutting to prevent water damage?
After cutting, seal the exposed edges immediately using edge banding for laminate worktops or specialist sealant for solid-surface materials. For laminate, apply iron-on edge tape or PVA adhesive-backed banding. For stone or quartz, use a food-safe silicone sealant. Allow sealant to cure fully before installing the sink. Proper edge sealing prevents moisture penetration and extends worktop life.
Can I repair a worktop if I make a mistake while cutting?
Small mistakes like minor chipping or uneven edges can sometimes be repaired using specialist filling compounds and colour matching, depending on the material and damage extent. However, a significant cutting error affecting the structural integrity or sink fit usually requires professional assessment. Surface Magic Repairs can advise whether a repair is suitable or if replacement is more practical. Send photographs of the damage and your postcode to check availability.
Is it better to cut a worktop from the top or bottom?
The method of cutting can depend on the material and desired outcome. Support the worktop firmly and mark your line clearly.