Table of Contents
- Is a Chipped Porcelain Tile Repairable?
- How Porcelain Differs from Ceramic When It Comes to Chips
- What You'll Need Before You Start
- Step 1: Assess the Chip and Decide If Repair Is the Right Call
- Step 2: Clean and Prepare the Damaged Area
- Step 3: Fill and Rebuild the Chip
- Step 4: Match the Colour, Pattern and Finish
- Choosing a Porcelain Tile Chip Repair Kit
- Step 5: Allow the Repair to Cure and Protect the Finished Surface
- Cost of Tile Repair vs Replacement: What Actually Decides It
- Common Mistakes to Avoid When Repairing Chipped Porcelain Tiles
- Frequently Asked Questions
Last Updated: September 15, 2026
Is a Chipped Porcelain Tile Repairable?
Yes, you can usually repair chipped porcelain tiles in place, and the repair can be colour- and finish-matched so the damage blends with the surrounding surface. At Surface Magic Repairs, we repair chipped tiles on site rather than removing and replacing them, which avoids the disruption, mess and knock-on work that replacement involves.
The one honest caveat: suitability depends on the material, the location of the chip and how deep the damage goes. A small surface chip on a glazed tile is a straightforward candidate. A tile that is cracked through its body, or one that has come loose from the substrate, is a different problem and may need replacing.
Below, we'll explain how a professional approaches a chipped porcelain tile, so you can decide whether to book a repair or accept that replacement is the more durable route.
How Porcelain Differs from Ceramic When It Comes to Chips
Porcelain is denser and less porous than ceramic, because it is fired at higher temperatures and pressed under greater pressure. That density is why porcelain chips differently: the chip tends to be sharper-edged and the exposed body underneath is often a different colour from the glazed face.
On a ceramic tile, the biscuit body is usually lighter and more uniform, so a repaired area blends more forgivingly. Porcelain often has a printed pattern or a through-body colour that must be reproduced, not simply filled.
There is also a practical difference in how the chip behaves over time. A chipped porcelain tile left untreated can trap dirt in the exposed body, and on a floor the damaged edge may continue to spall under foot traffic. Repairing it early usually means a smaller, simpler job.
What You'll Need Before You Start
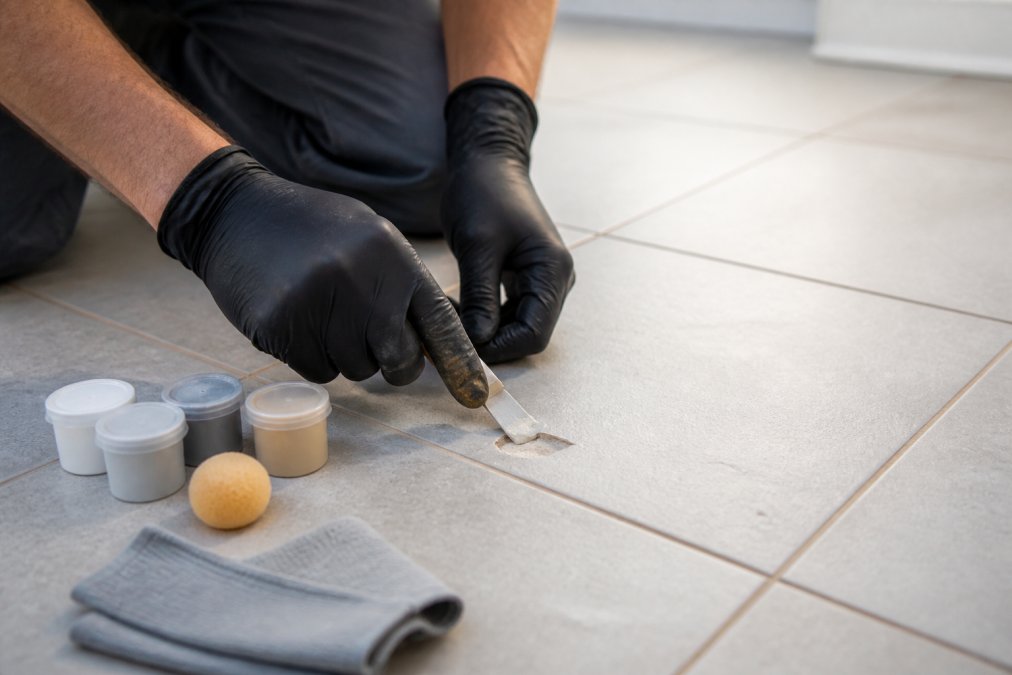
A proper porcelain tile chip repair kit contains the materials a technician needs. The colour-matching system is the core of it: without a way to tint the filler to the tile's actual shade, the repair will never disappear.
Photographs of the tile, the chip and the surrounding area are also useful, because they let a specialist confirm the tile is a suitable candidate.
Step 1: Assess the Chip and Decide If Repair Is the Right Call
Assessment comes first, and it decides everything that follows. Look at three things: the depth of the chip, the condition of the tile around it, and whether the tile is still firmly bonded.
Depth is the main factor. A chip that only removes the glaze is a surface repair. A chip that exposes the tile body needs filling and rebuilding. A crack that runs through the tile, or a tile that sounds hollow when tapped, points towards replacement rather than repair.
Then check the surrounding area. If the tile is one of a run with several chipped edges, a batch repair is usually more economical than treating each one separately. If the chip sits in a wet area, such as a shower wall, the repair needs a finish that will tolerate regular cleaning.
- Chip is surface-level or shallow, not a through-crack
- Tile is firmly bonded and does not sound hollow
- No water damage or staining behind the tile
- Surrounding tiles are sound enough to work around
- The finish can be matched to the existing tile
If most boxes tick, repair is likely the sensible option. If several do not, ask for an honest assessment before committing.
Step 2: Clean and Prepare the Damaged Area
Preparation is where a repair succeeds or fails. The chip must be completely clean, dry and free of loose material before any filler goes near it.
A technician will remove dust and debris with a small brush, degrease the area, and gently key the exposed surface so the filler has something to grip. Any loose fragments of glaze around the edge are removed rather than filled over, because they will break away later and take the repair with them.
This is also the stage where the colour match is planned. The technician checks the tile under the lighting of the room, because porcelain changes apparent shade between daylight, warm white and cool white. A match that looks perfect under a work lamp can look wrong under a bathroom downlight.
Step 3: Fill and Rebuild the Chip
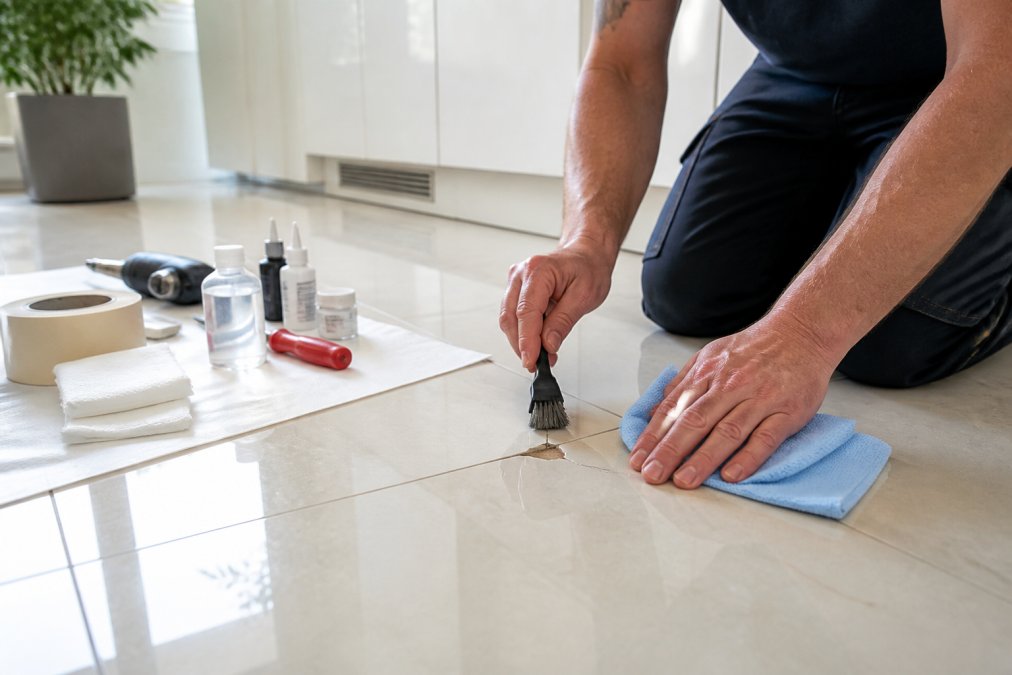
Filling and rebuilding is the technical heart of the job, and it is the stage where specialist materials and training make the biggest difference. The filler is applied in thin layers rather than one thick blob, building the chip back up to the level of the surrounding glaze.
Each layer is allowed to set before the next goes on. This controls shrinkage, which is what causes a repair to sink below the tile surface and show as a dip. On a deeper chip, the technician may build the shape in stages, checking the profile against the surrounding tile as they go.
Once the fill is level, the surface is worked back with fine abrasives until it sits flush. On a floor tile, this matters more than on a wall tile, because any proud edge will catch underfoot and wear quickly.
Step 4: Match the Colour, Pattern and Finish
Colour matching is what separates an invisible repair from an obvious patch. Porcelain tiles are rarely a single flat colour; most have a printed pattern, a mottle, a veining or a speckle that the repair has to continue across the filled area.
A technician reproduces that pattern by hand, layering pigments and blending them outwards into the surrounding tile so there is no hard edge. On a plain tile this is straightforward. On a heavily patterned or stone-effect porcelain, it takes longer and the result depends on how complex the pattern is.
Finish is the second half of the match. A matt tile needs a matt topcoat, a polished tile needs a gloss. Getting the sheen wrong is just as visible as getting the colour wrong, particularly on a floor where light rakes across the surface.
This is why no honest repair specialist guarantees an invisible result on every tile. A close, blended match that reads correctly from normal viewing distance is the realistic outcome, and on most tiles it is very good.
Choosing a Porcelain Tile Chip Repair Kit
| Situation | DIY kit | Specialist repair |
|---|---|---|
| Small glaze chip, plain tile | Suitable | Suitable |
| Deep chip needing rebuild | Not recommended | Suitable |
| Patterned or stone-effect tile | Limited match | Best match |
| Floor tile in a traffic area | Short-lived | Durable |
| Multiple tiles across a property | Slow, inconsistent | Efficient, consistent |
Step 5: Allow the Repair to Cure and Protect the Finished Surface
Curing takes longer than most people expect, and rushing it undoes the work. The filler and topcoat need their full curing window before the surface is exposed to water, cleaning products or foot traffic.
In practice, a repaired tile should be kept dry and undisturbed for the period the product specifies, and treated gently for a little longer after that. On a floor, avoid dragging furniture across the repair for the first few days.
Cost of Tile Repair vs Replacement: What Actually Decides It
The cost of tile repair vs replacement is not decided by the price of a single tile. It is decided by everything replacement drags in with it.
Replacing one tile in the middle of a run means breaking it out without damaging its neighbours, which is not always possible. If the tile is discontinued, a matching replacement may not exist, so the choice becomes a visible odd tile or a full re-tile of the area. On a wall, that can mean removing sanitaryware. On a floor, it can mean lifting and relaying a section.
Repair avoids all of that. The tile stays in place, the surrounding tiles are untouched, and there is no decorating or re-grouting to follow. For landlords, hotels and property managers, the bigger saving is usually downtime: a room can often be returned to use far sooner than a replacement job would allow.
Cost itself depends on the surface, the extent of the damage, access, the finish required and how many repairs are needed. Surface Magic Repairs does not quote blind. Send clear photographs of the damage, the complete item and the surrounding area, together with your full address and postcode, and the team can assess whether a repair is suitable and provide a quotation.
Common Mistakes to Avoid When Repairing Chipped Porcelain Tiles
The same handful of errors turn a straightforward job to repair chipped porcelain tiles into a replacement job. Most of them happen before any filler is applied.
A common mistake is treating a crack as a chip. If the tile is cracked through, filling the visible line will not stop the crack spreading, and the tile will need replacing. Knowing the difference saves wasted effort.
If the damage is beyond a cosmetic chip, or if you would rather not risk a visible patch on a good tile, that is exactly the situation to send photographs for. Surface Magic Repairs will tell you honestly whether repair or replacement is the better answer, and if replacement is the right call, they will say so.
A chipped porcelain tile is rarely a reason to rip out a floor or re-tile a bathroom. In most cases it is a small, contained repair that restores the appearance of the tile without the mess, cost or downtime of replacement. Where suitability is borderline, the honest answer is worth more than a quick sale.
Surface Magic Repairs repairs chipped and damaged tiles in place, with colour and finish matched to the surrounding surface. The team works with homeowners, landlords, letting agents, property managers, hotels and housebuilders, and has repaired more than 46,000 surfaces in the last year. Repairs are carried out on site, so there is no strip-out, no unnecessary waste and no knock-on decorating.
Send clear photographs of the damage, the complete item and the surrounding area, together with your full address and postcode. Surface Magic Repairs can assess whether a repair is suitable and provide a quotation. Call 0800 085 7773 or visit surfacemagicrepairs.co.uk to get started.
Frequently Asked Questions
Can you repair a chip in a porcelain tile without replacing it?
Yes, in many cases. A cosmetic chip on a porcelain tile can be filled, colour matched and refinished in place, so the tile stays put and there is no need to break it out. Suitability depends on the depth of the chip, its location, and whether the tile is load-bearing or in a wet area. A shallow chip on a wall tile or a floor tile in a low-traffic spot is usually a good candidate. A deep chip that exposes the tile body, or damage near a drain or threshold, may need professional assessment before deciding.
Is it better to repair or replace a chipped floor tile?
It depends on the extent of the damage and whether you have matching spare tiles. A repair avoids the dust, noise and disruption of removing a tile, and it also avoids the risk of damaging neighbouring tiles during removal. Replacement makes sense when the tile is cracked through, loose, or in a high-traffic area where the repair may not hold. For landlords and facilities managers, repair is often the faster route between tenancies or guest stays because the work is done on site without strip-out.
How do professionals match the colour of a repaired tile?
Colour matching is done by eye and by building up layers rather than relying on a single shade. A technician assesses the tile's base colour, any veining or pattern, and the finish, whether matt, satin or gloss. Pigments are mixed and applied in thin coats, then adjusted once dry because many fillers and coatings shift slightly as they cure. The repaired area is then textured and sealed to blend with the surrounding surface. Results depend on the tile and the damage, so a repair is intended to significantly improve the area rather than guarantee an invisible finish.
How long does a professional tile repair take to cure?
Cure times vary by product and by the depth of the fill. Many cosmetic tile repairs are touch-dry within an hour and can be walked on or cleaned carefully the same day, while deeper fills and coatings may need longer before they reach full hardness. In a hotel or rental setting, that usually means a room can be back in use quickly without waiting for a full tile replacement. Always follow the product instructions and avoid scrubbing or heavy cleaning on the repaired area until it has fully cured.